Setting Up a Round Robin Team Event
-
Ensure a Team exists If not already created, go to your organization and create a Team. For example, a team named
Saleswith the slugsales.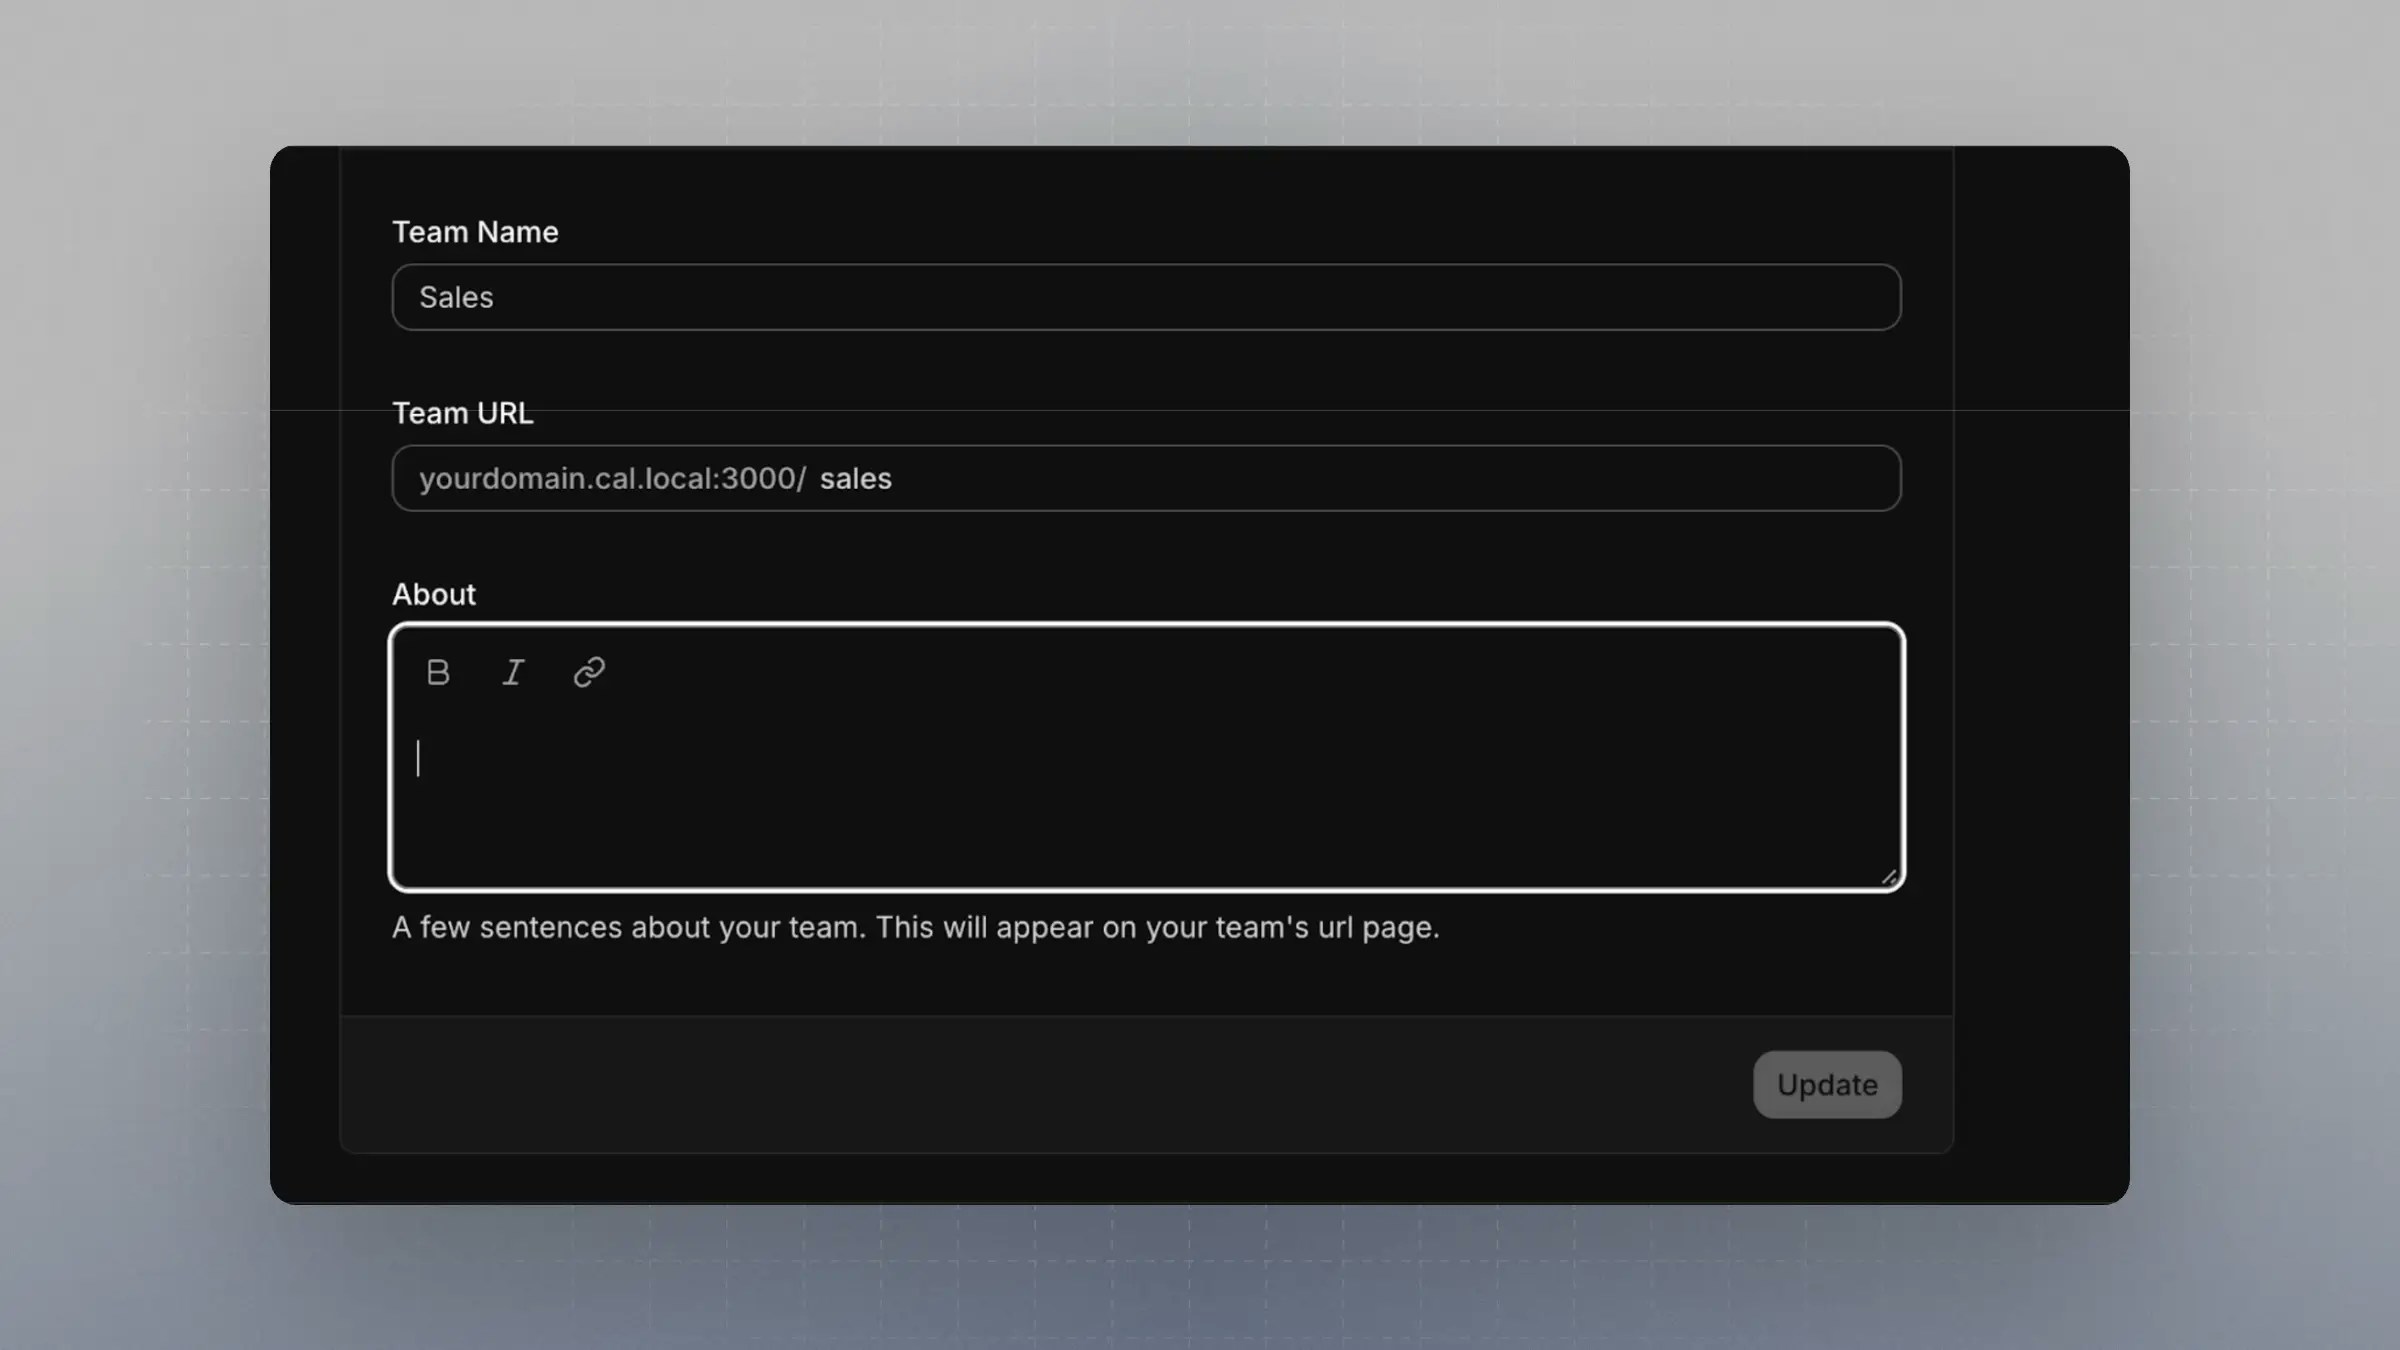
-
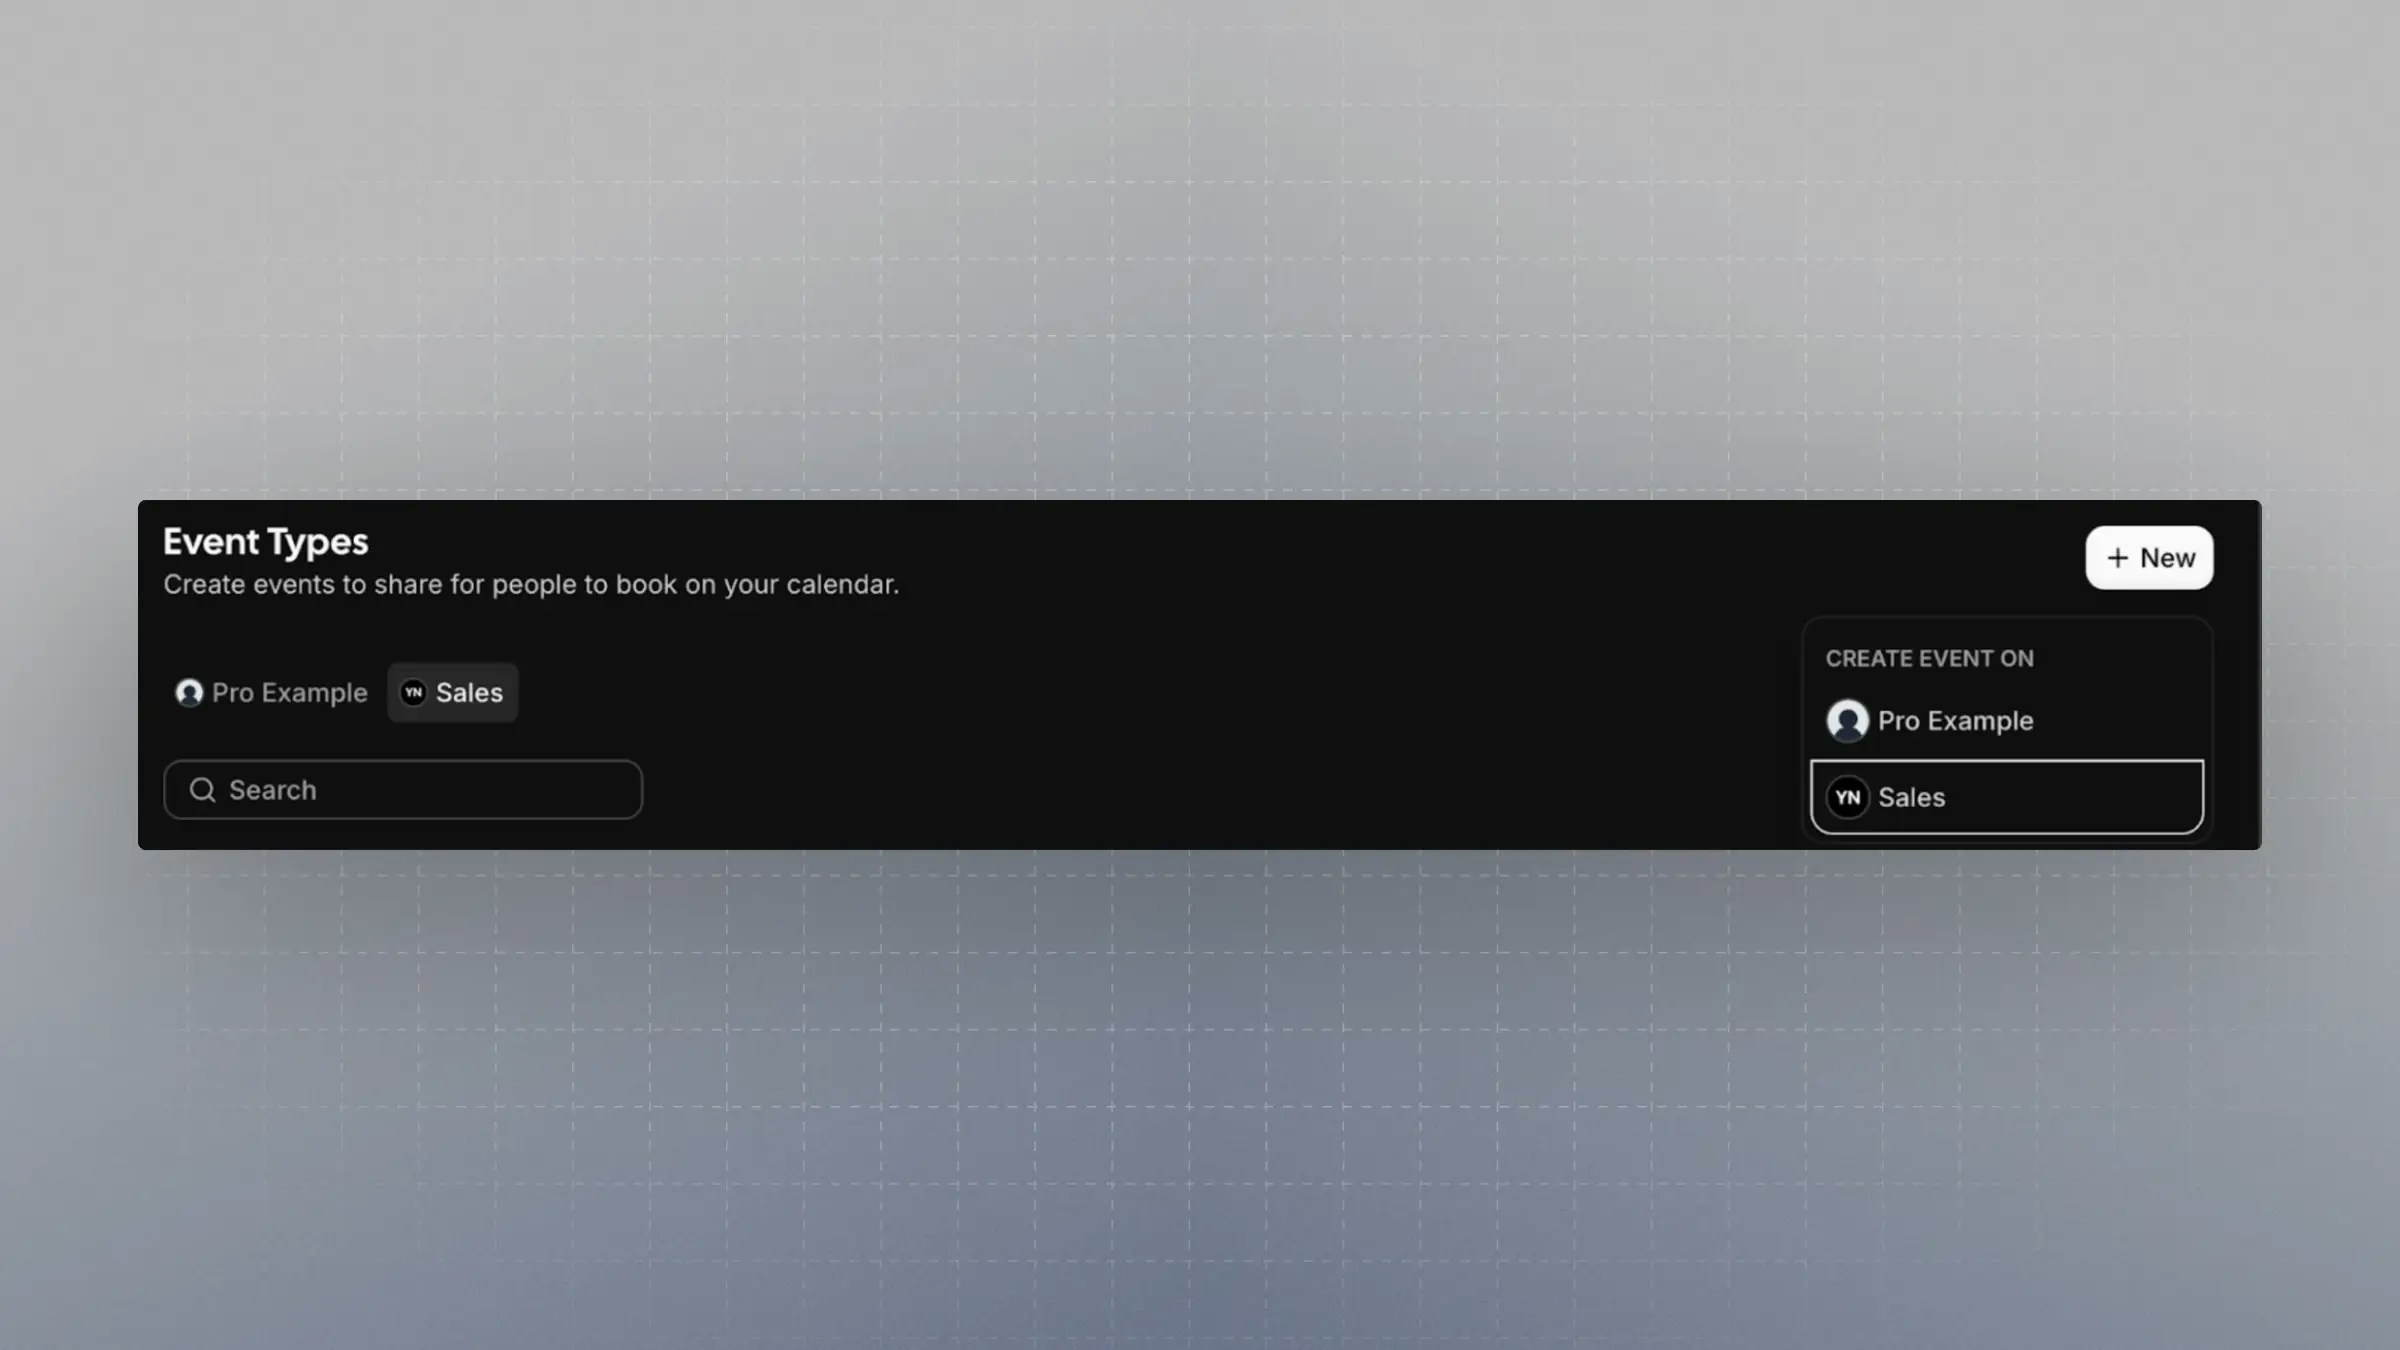
Create a Round Robin Event Type
Create this event under the team you just set up.
Important: Enable the setting
Add all team members, including future members. This ensures team members are selected dynamically based on attributes.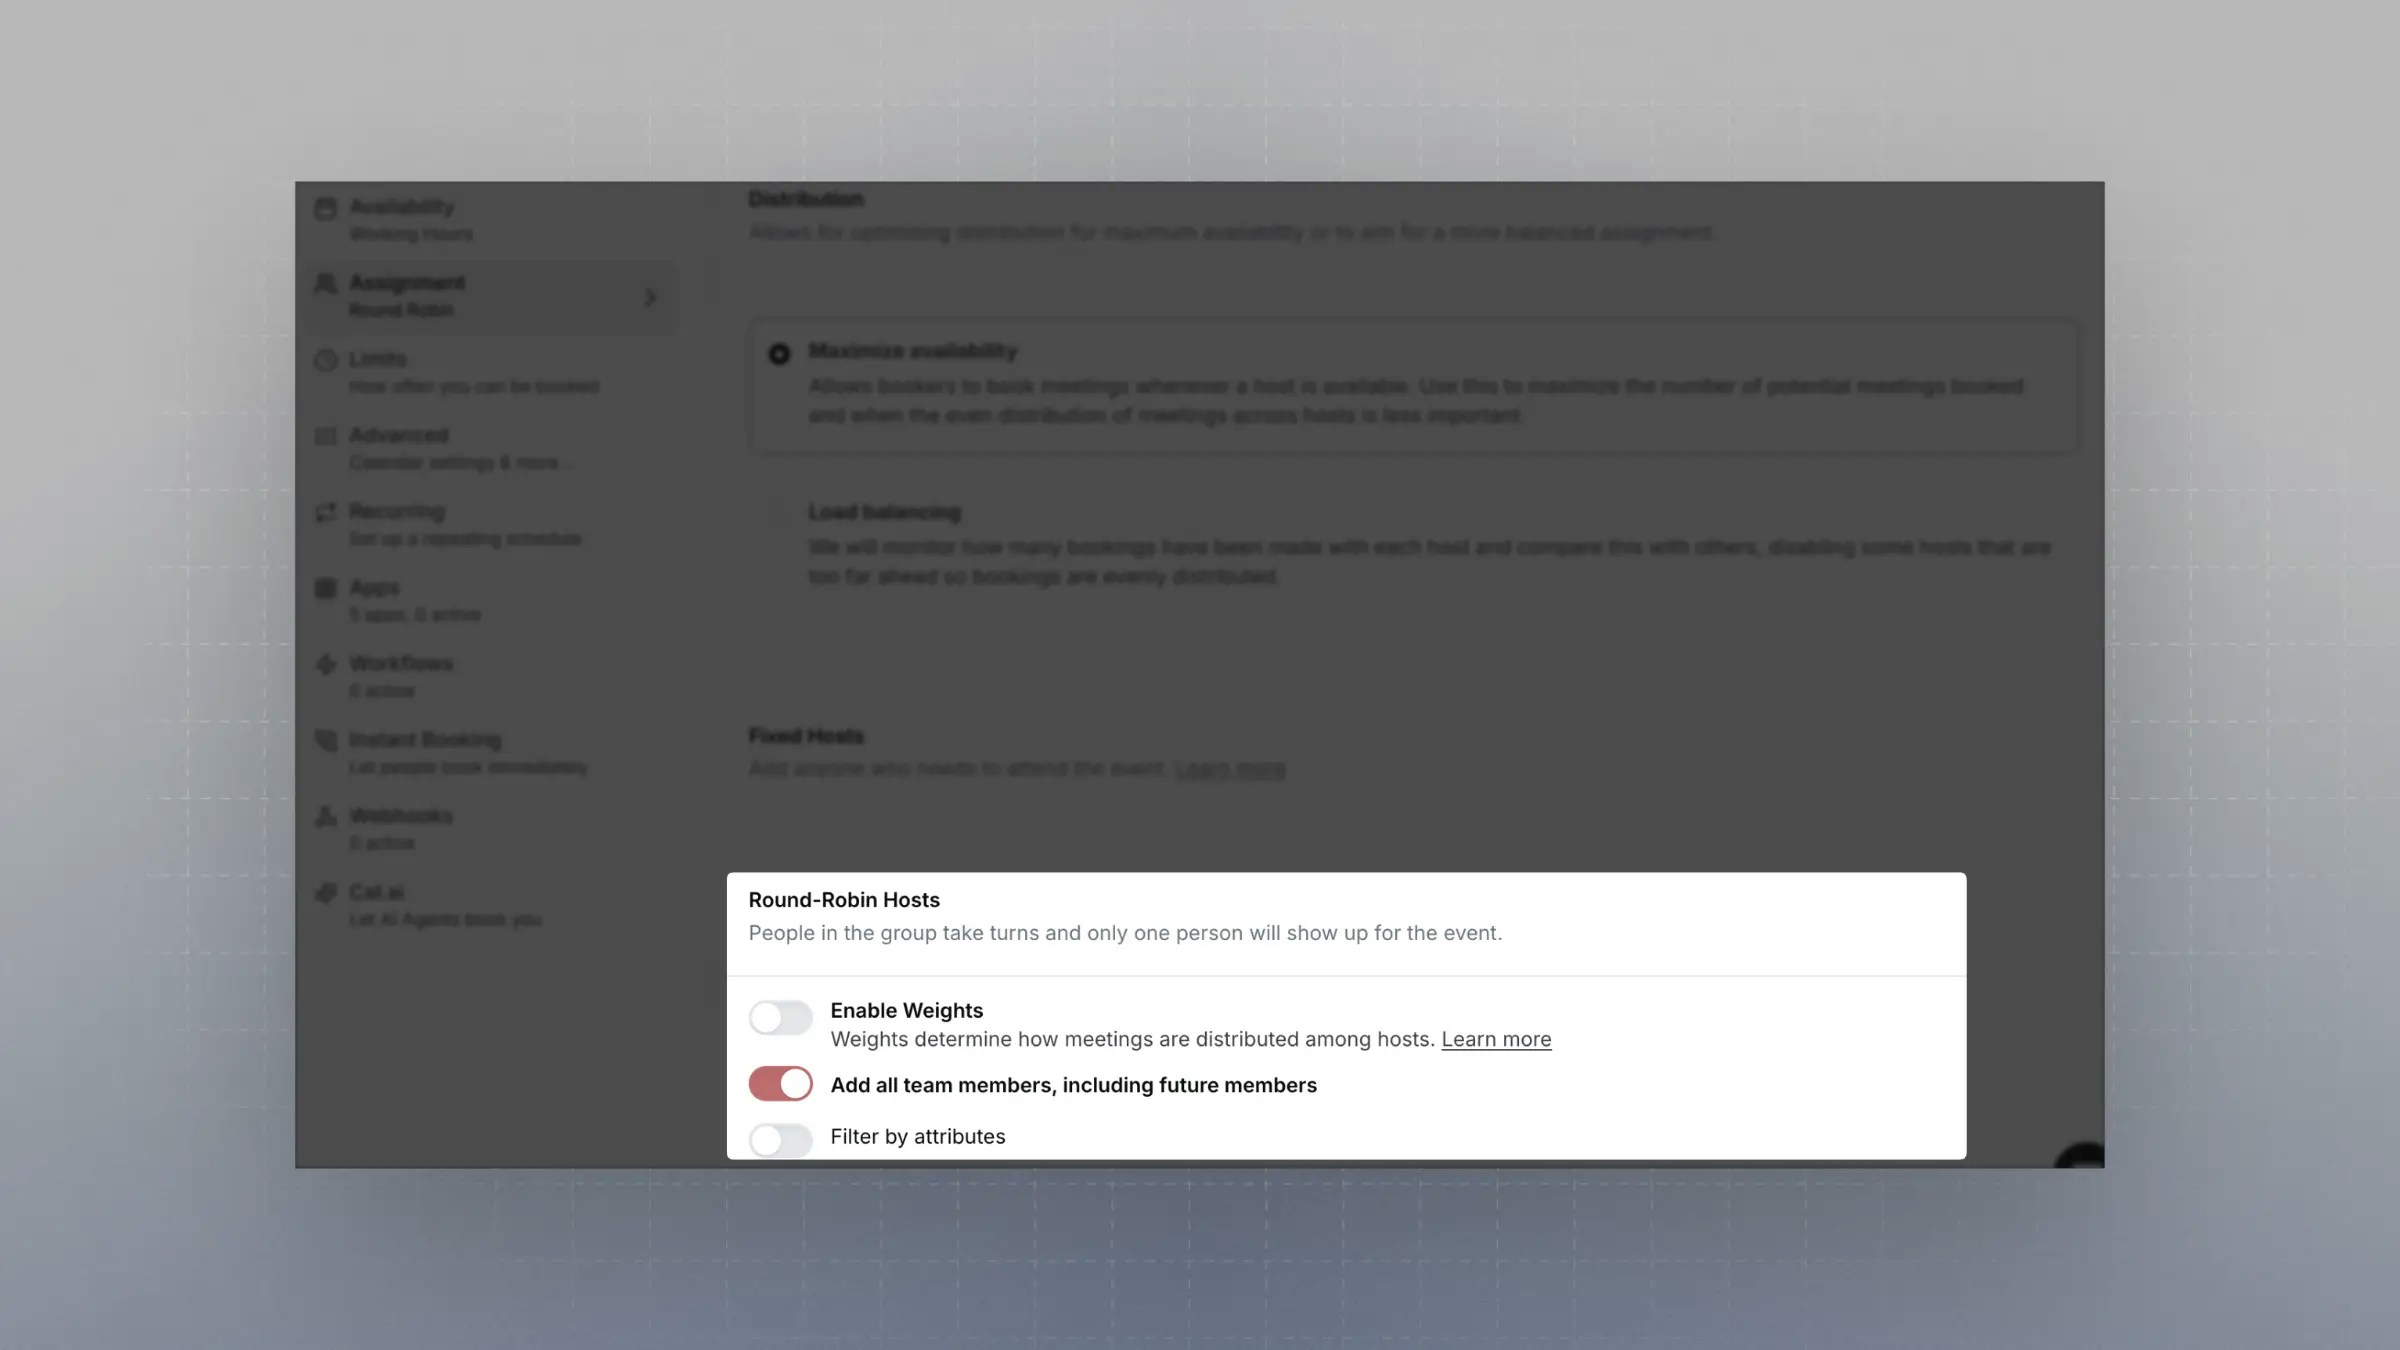
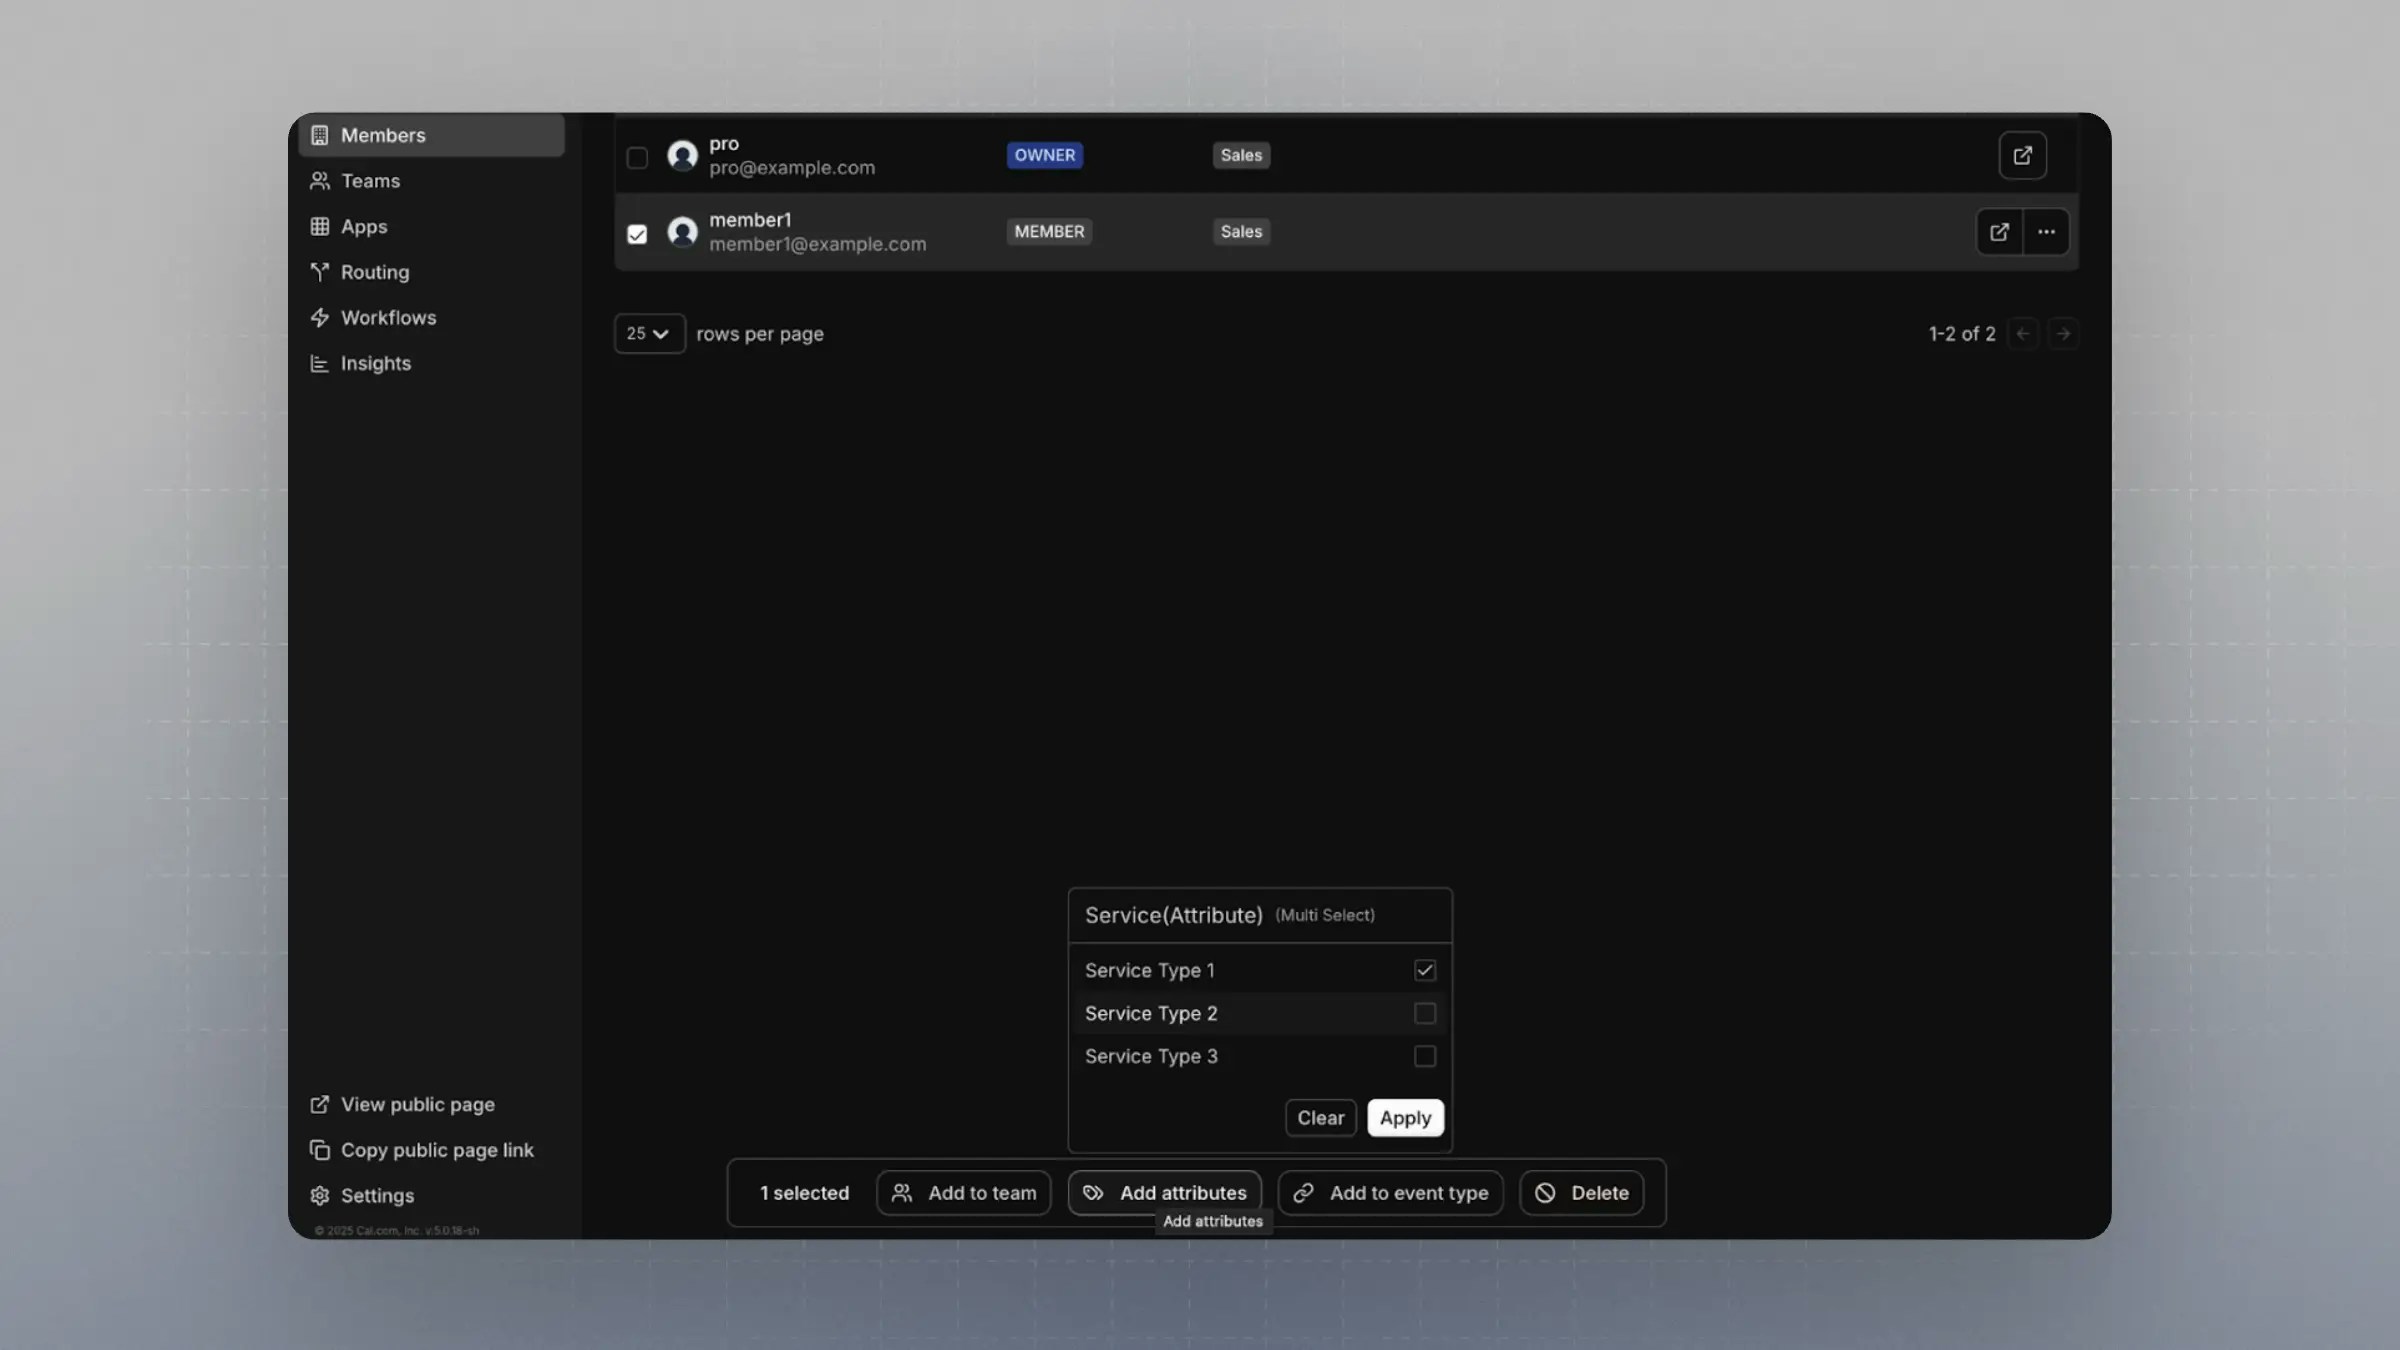
Creating an Attribute
Attributes let you define filters that team members can be matched against.
-
Go to Organization Attributes
-
Create one or more attributes.
-
For matching use cases, Multi Select is a great option—especially when team members might belong to multiple attribute values.
-
Example: Create an attribute with the name
Service (Attribute)to clearly indicate it’s used in attribute-based routing.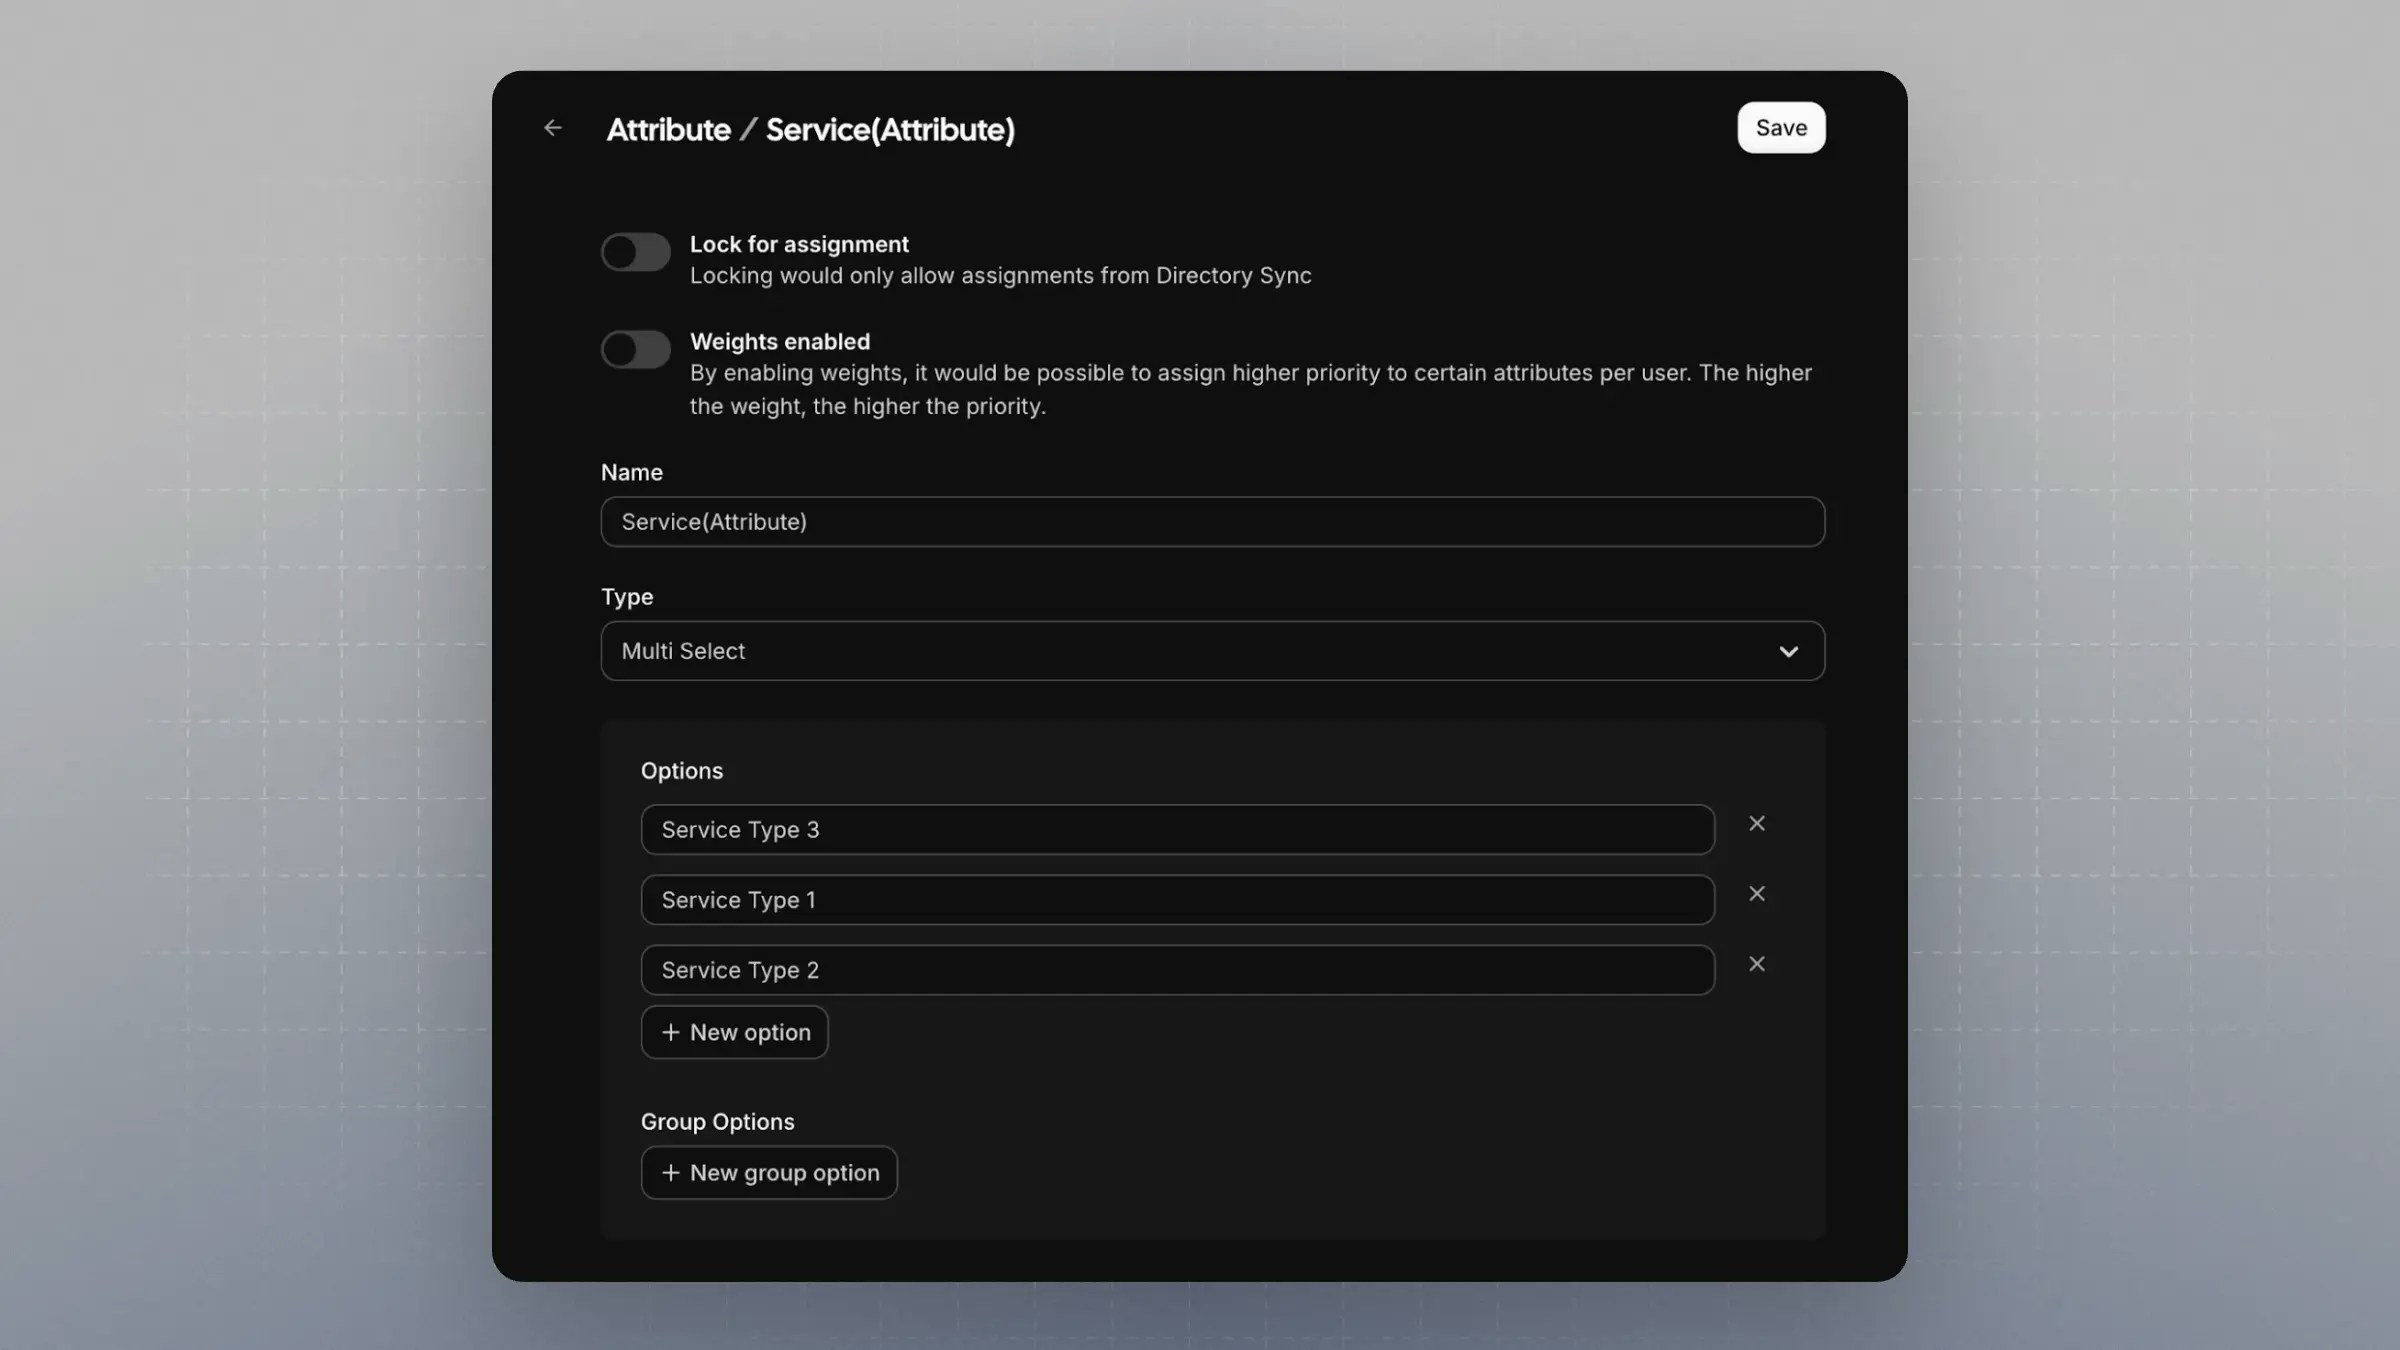
-
-
Assign the attribute to one or more team members. This step is critical.
Setting Up a Routing Form
-
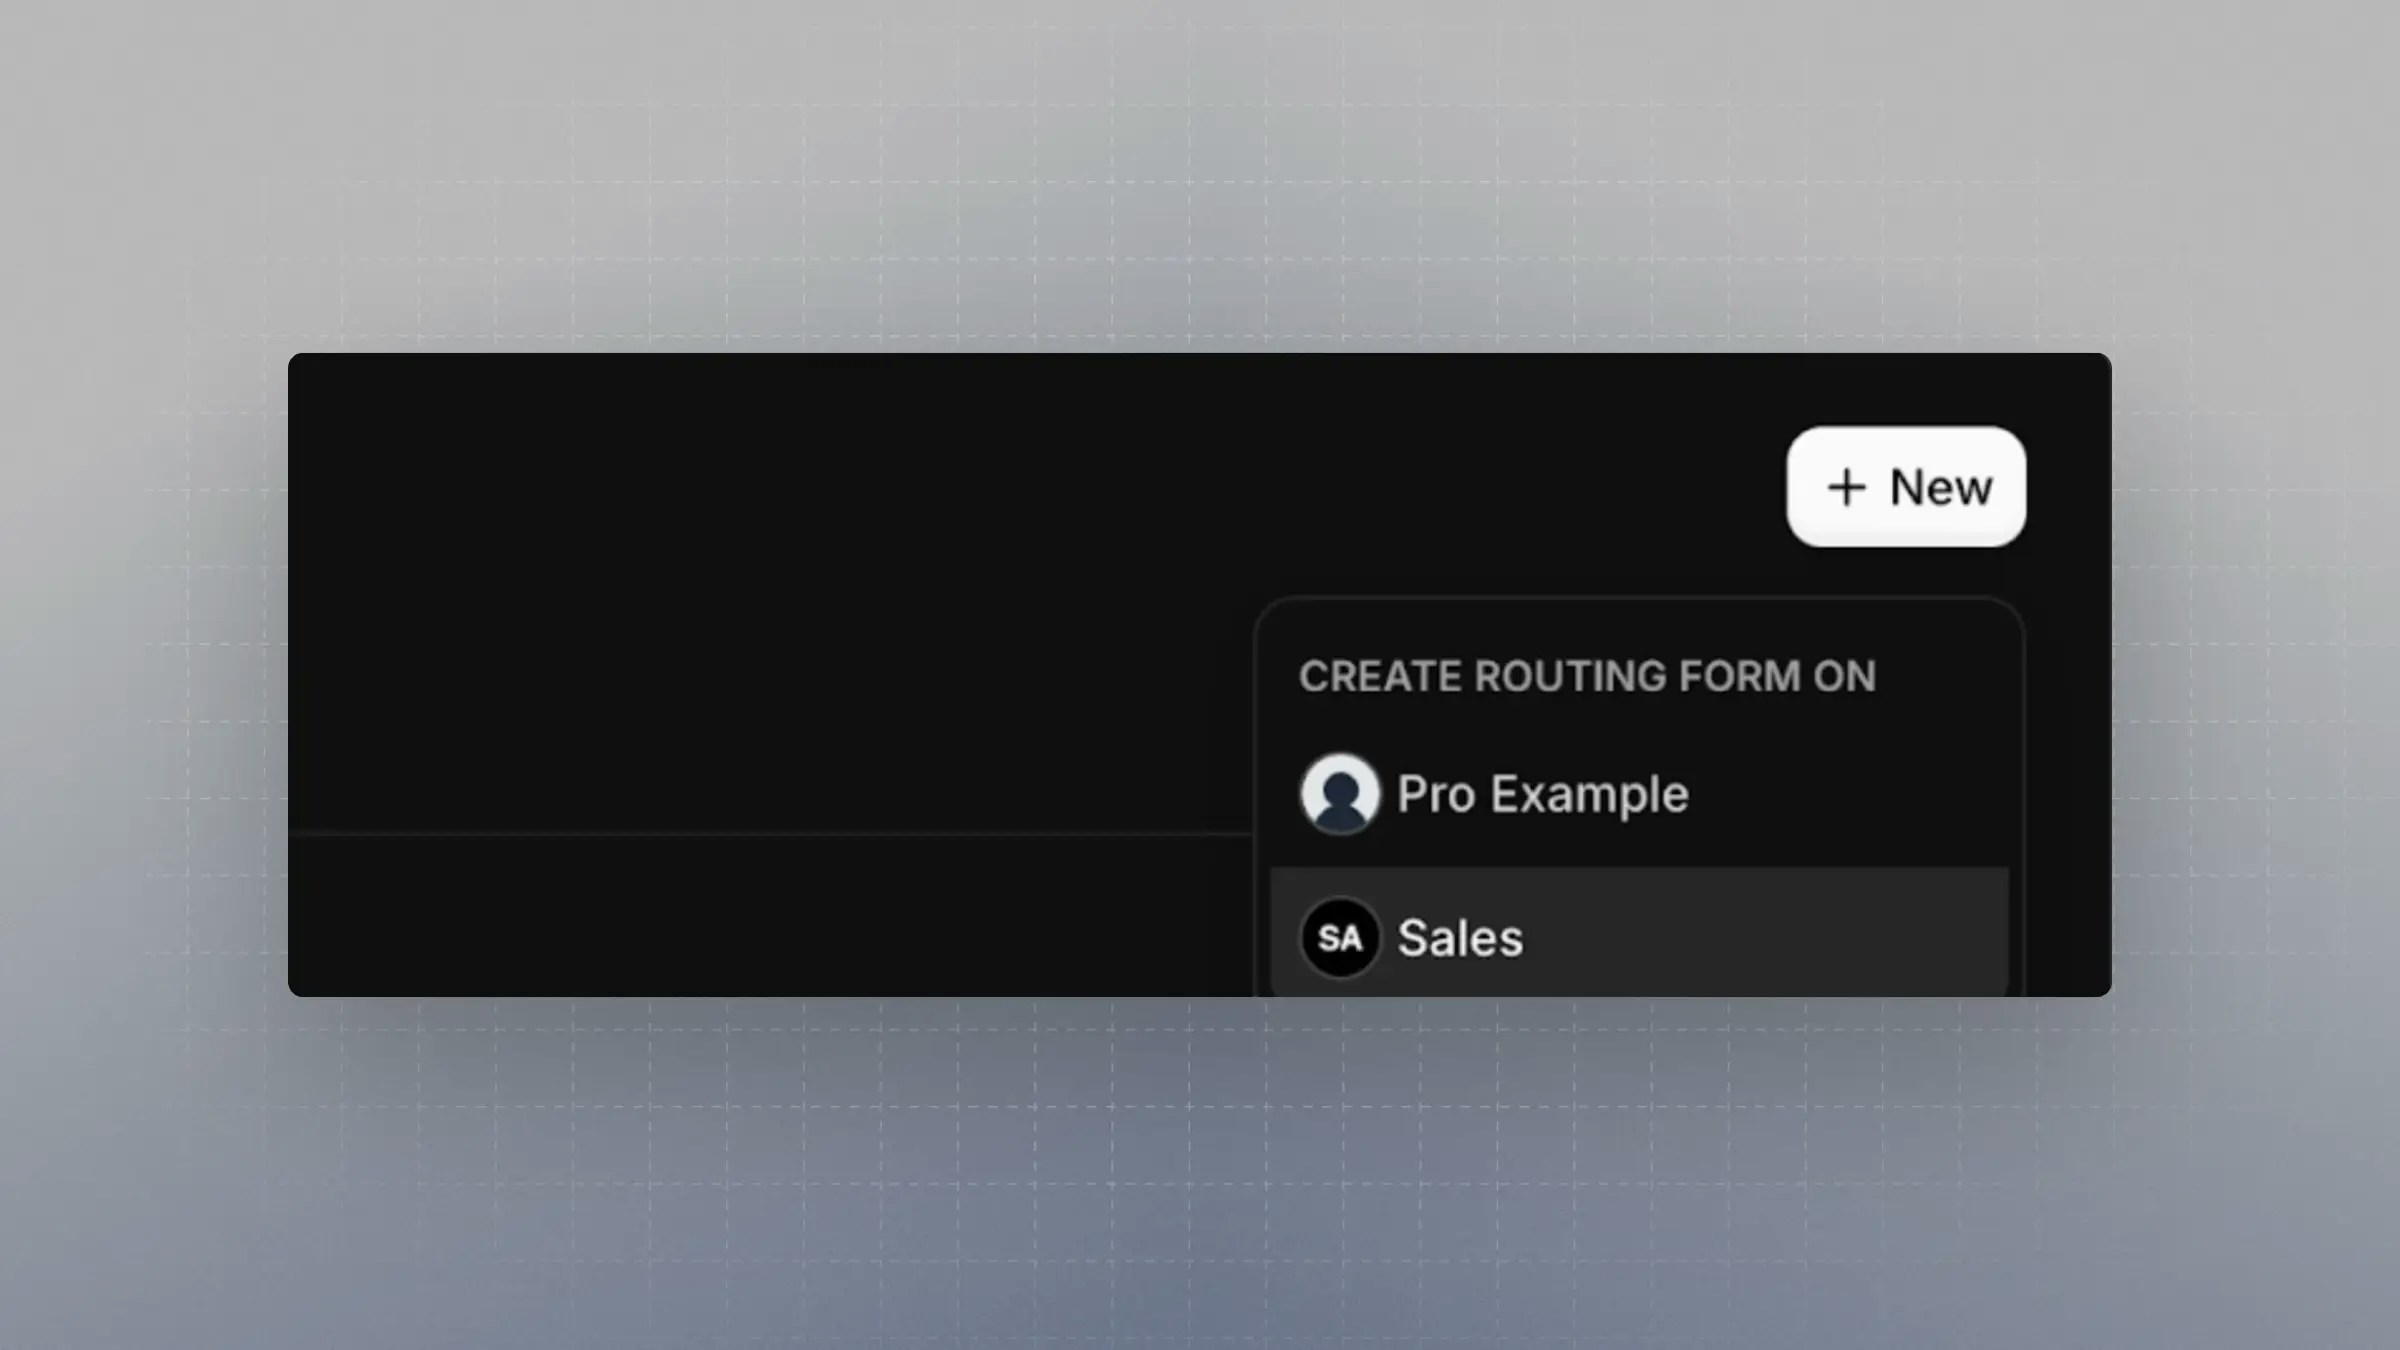
Navigate to Routing Forms
-
Create a new Routing Form under the same team as your event type.
-
Add fields that you want bookers to fill out.
- It’s recommended to include an
Emailfield with the identifieremailto enable integrations with CRMs and contact lookup tools.
- It’s recommended to include an
-
Create another field that matches the options from the attribute you set up.
-
The name and identifier don’t have to match the attribute name.
-
Example: A
Servicefield with identifierservice, where the options are identical to those inService (Attribute).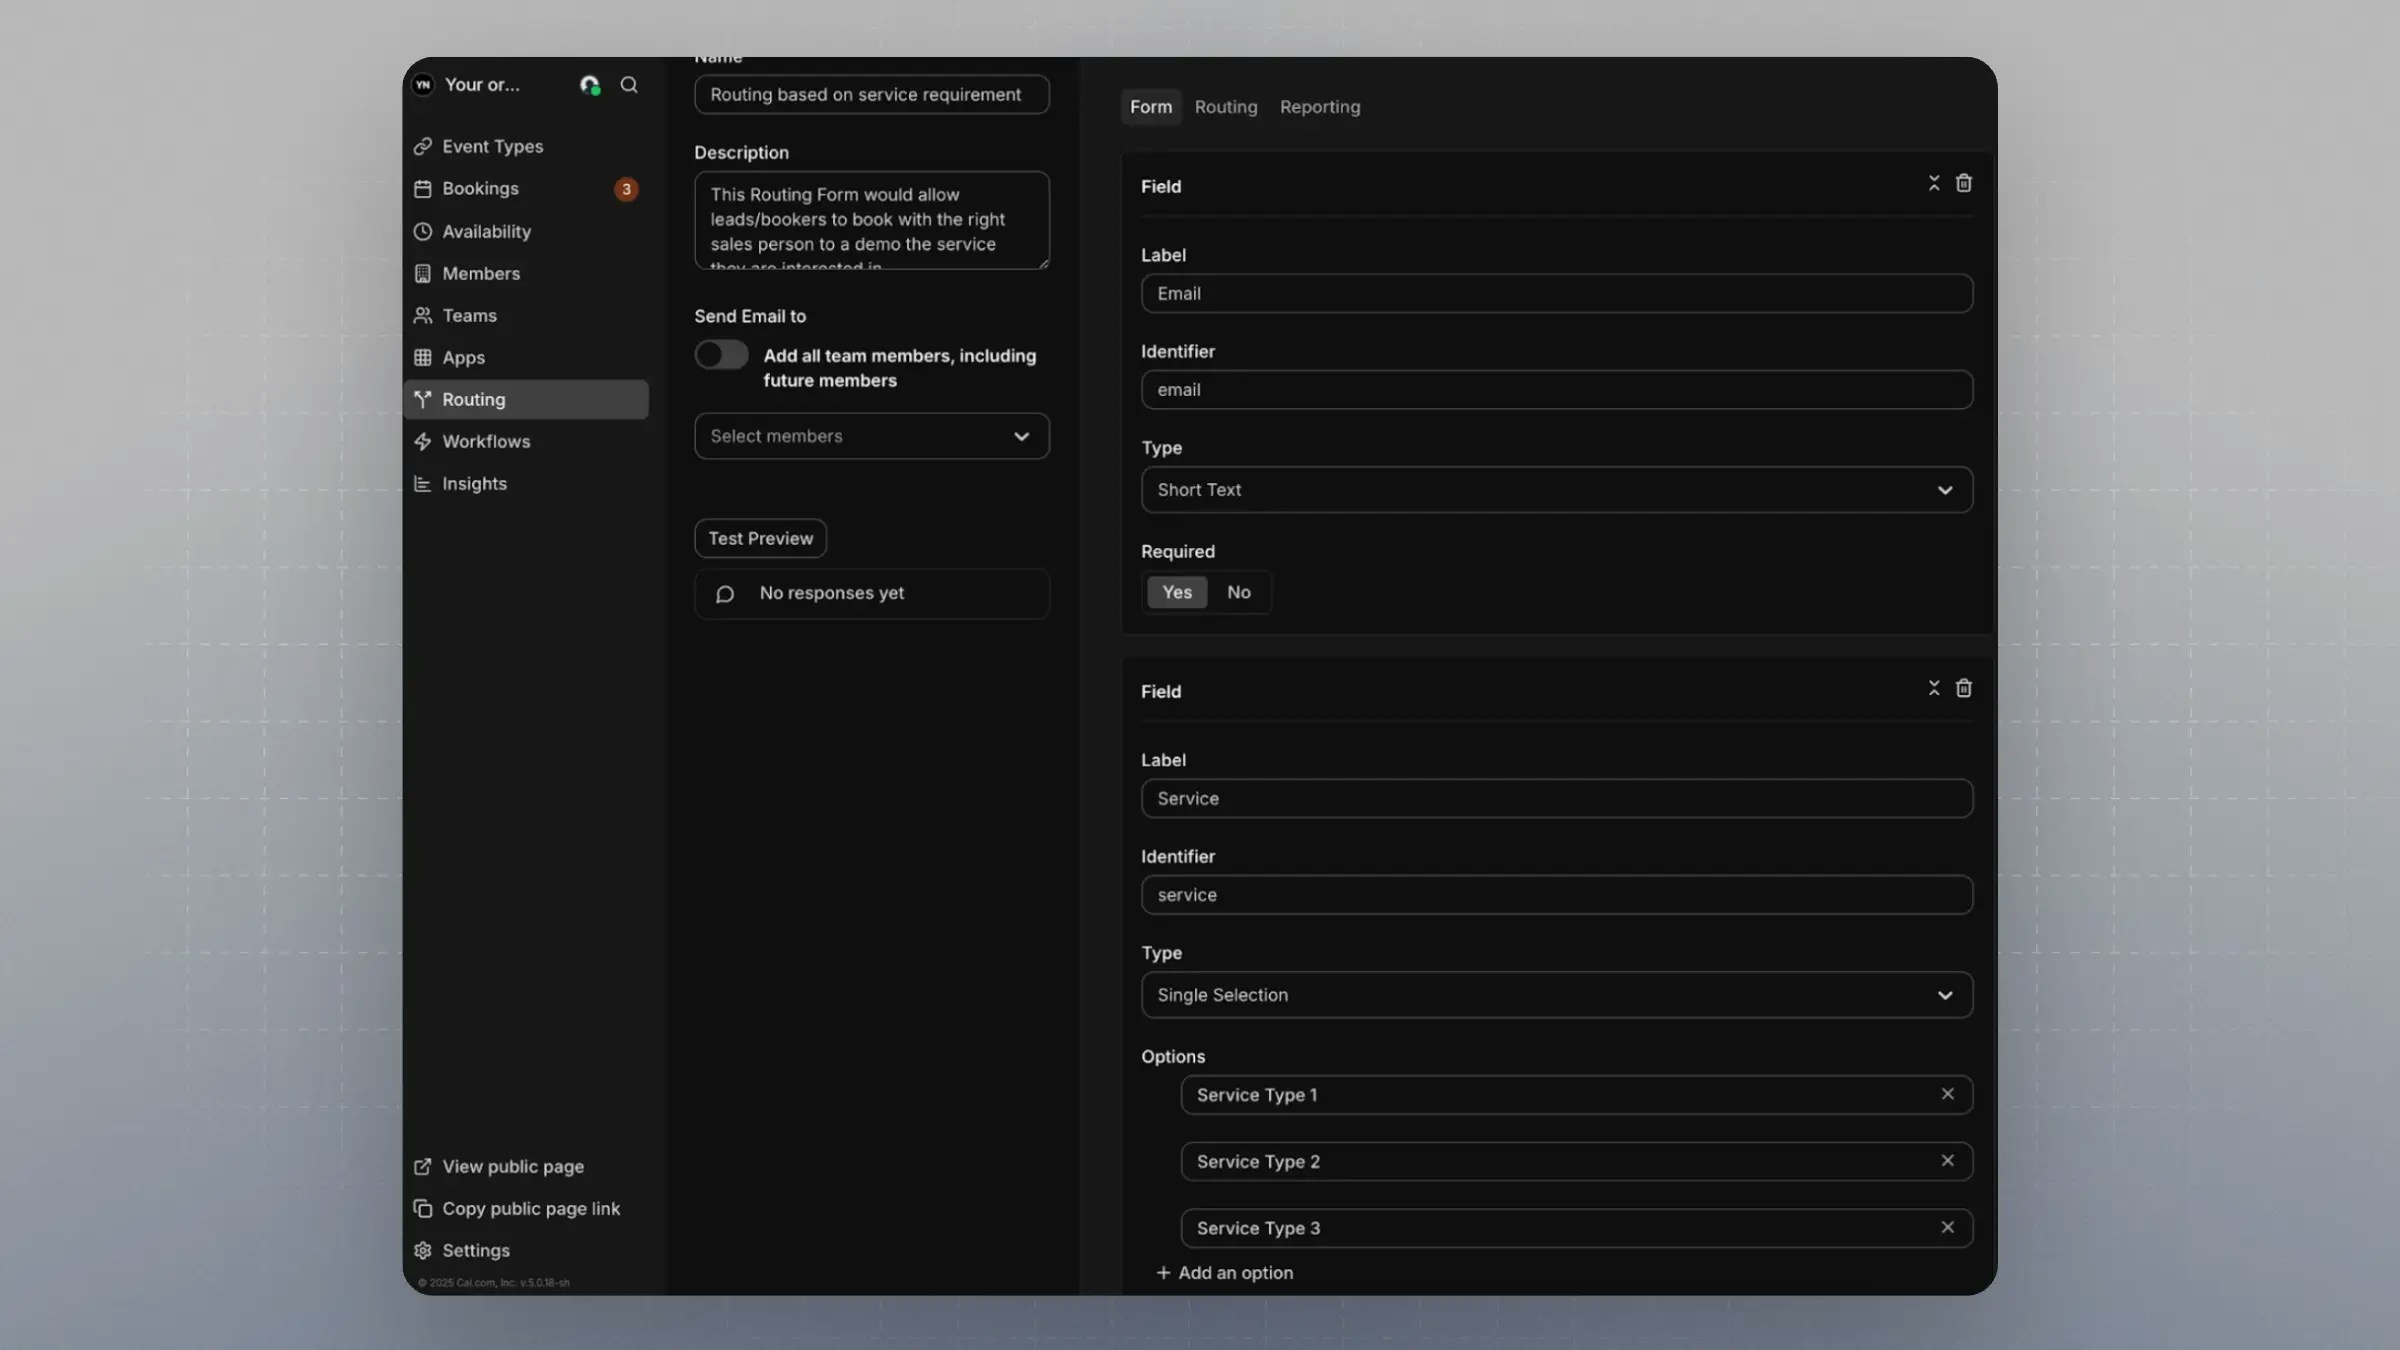
-
Connecting the RR Team Event, Attributes, and Routing Form
-
In your Routing Form, go to the Routing tab
-
Click
Add a new Route -
Link the Routing Form field to the corresponding Attribute
For example, connect the
Service (Attribute)to theServicefield in your Routing Form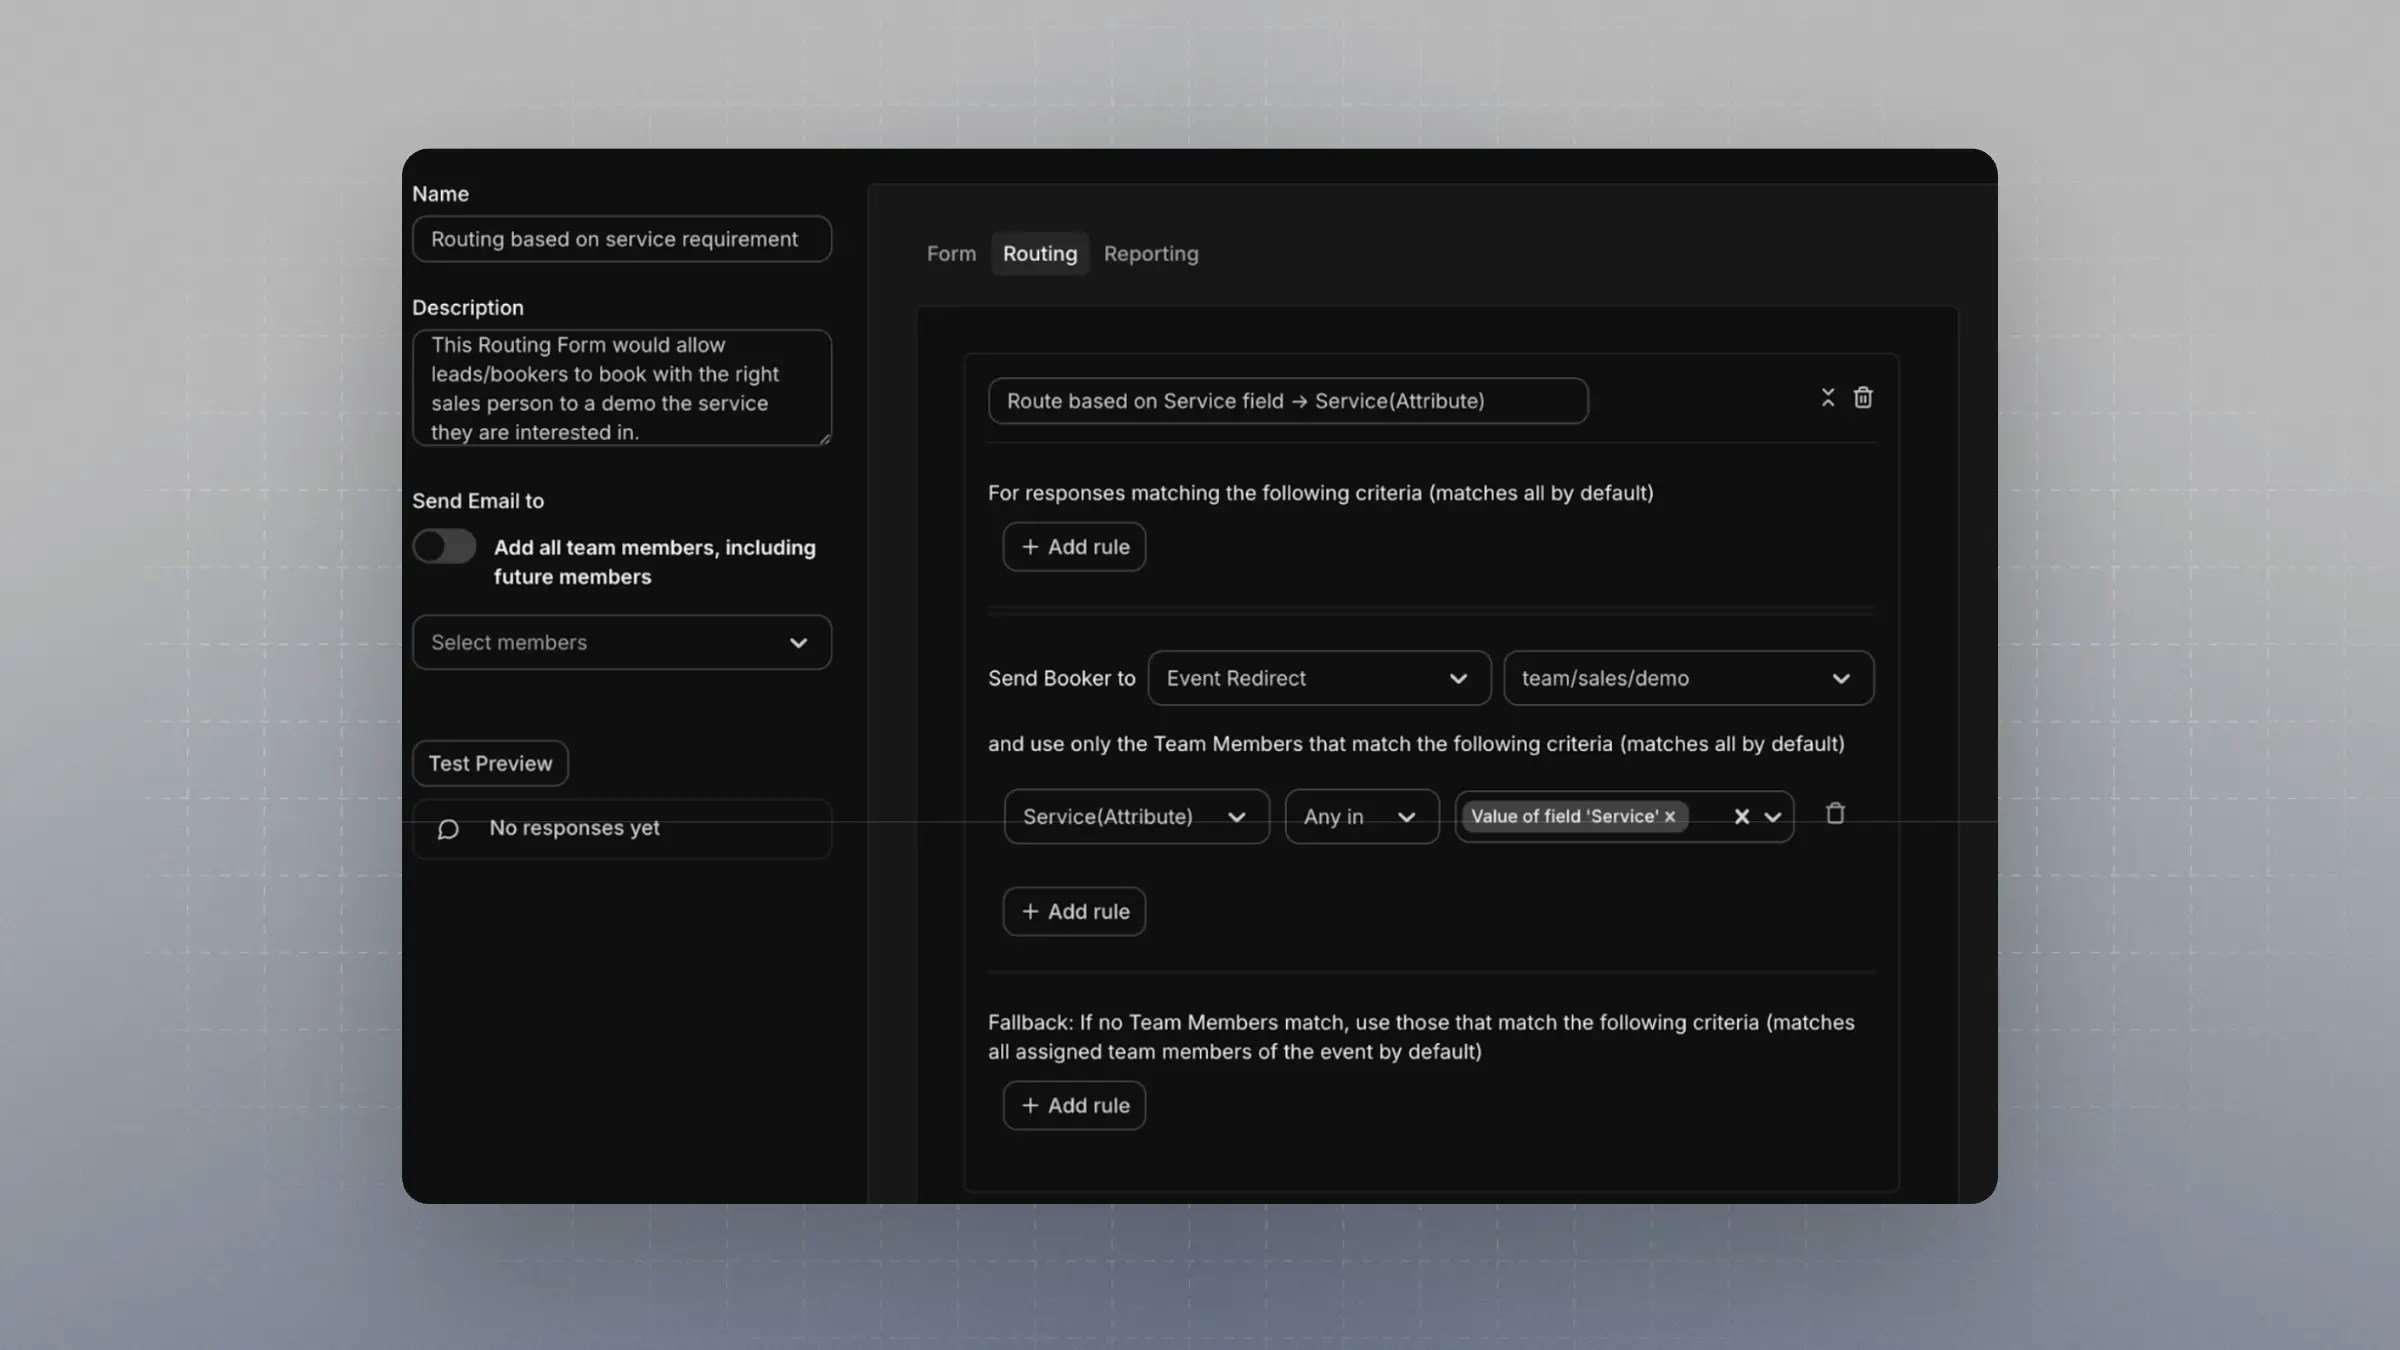
-
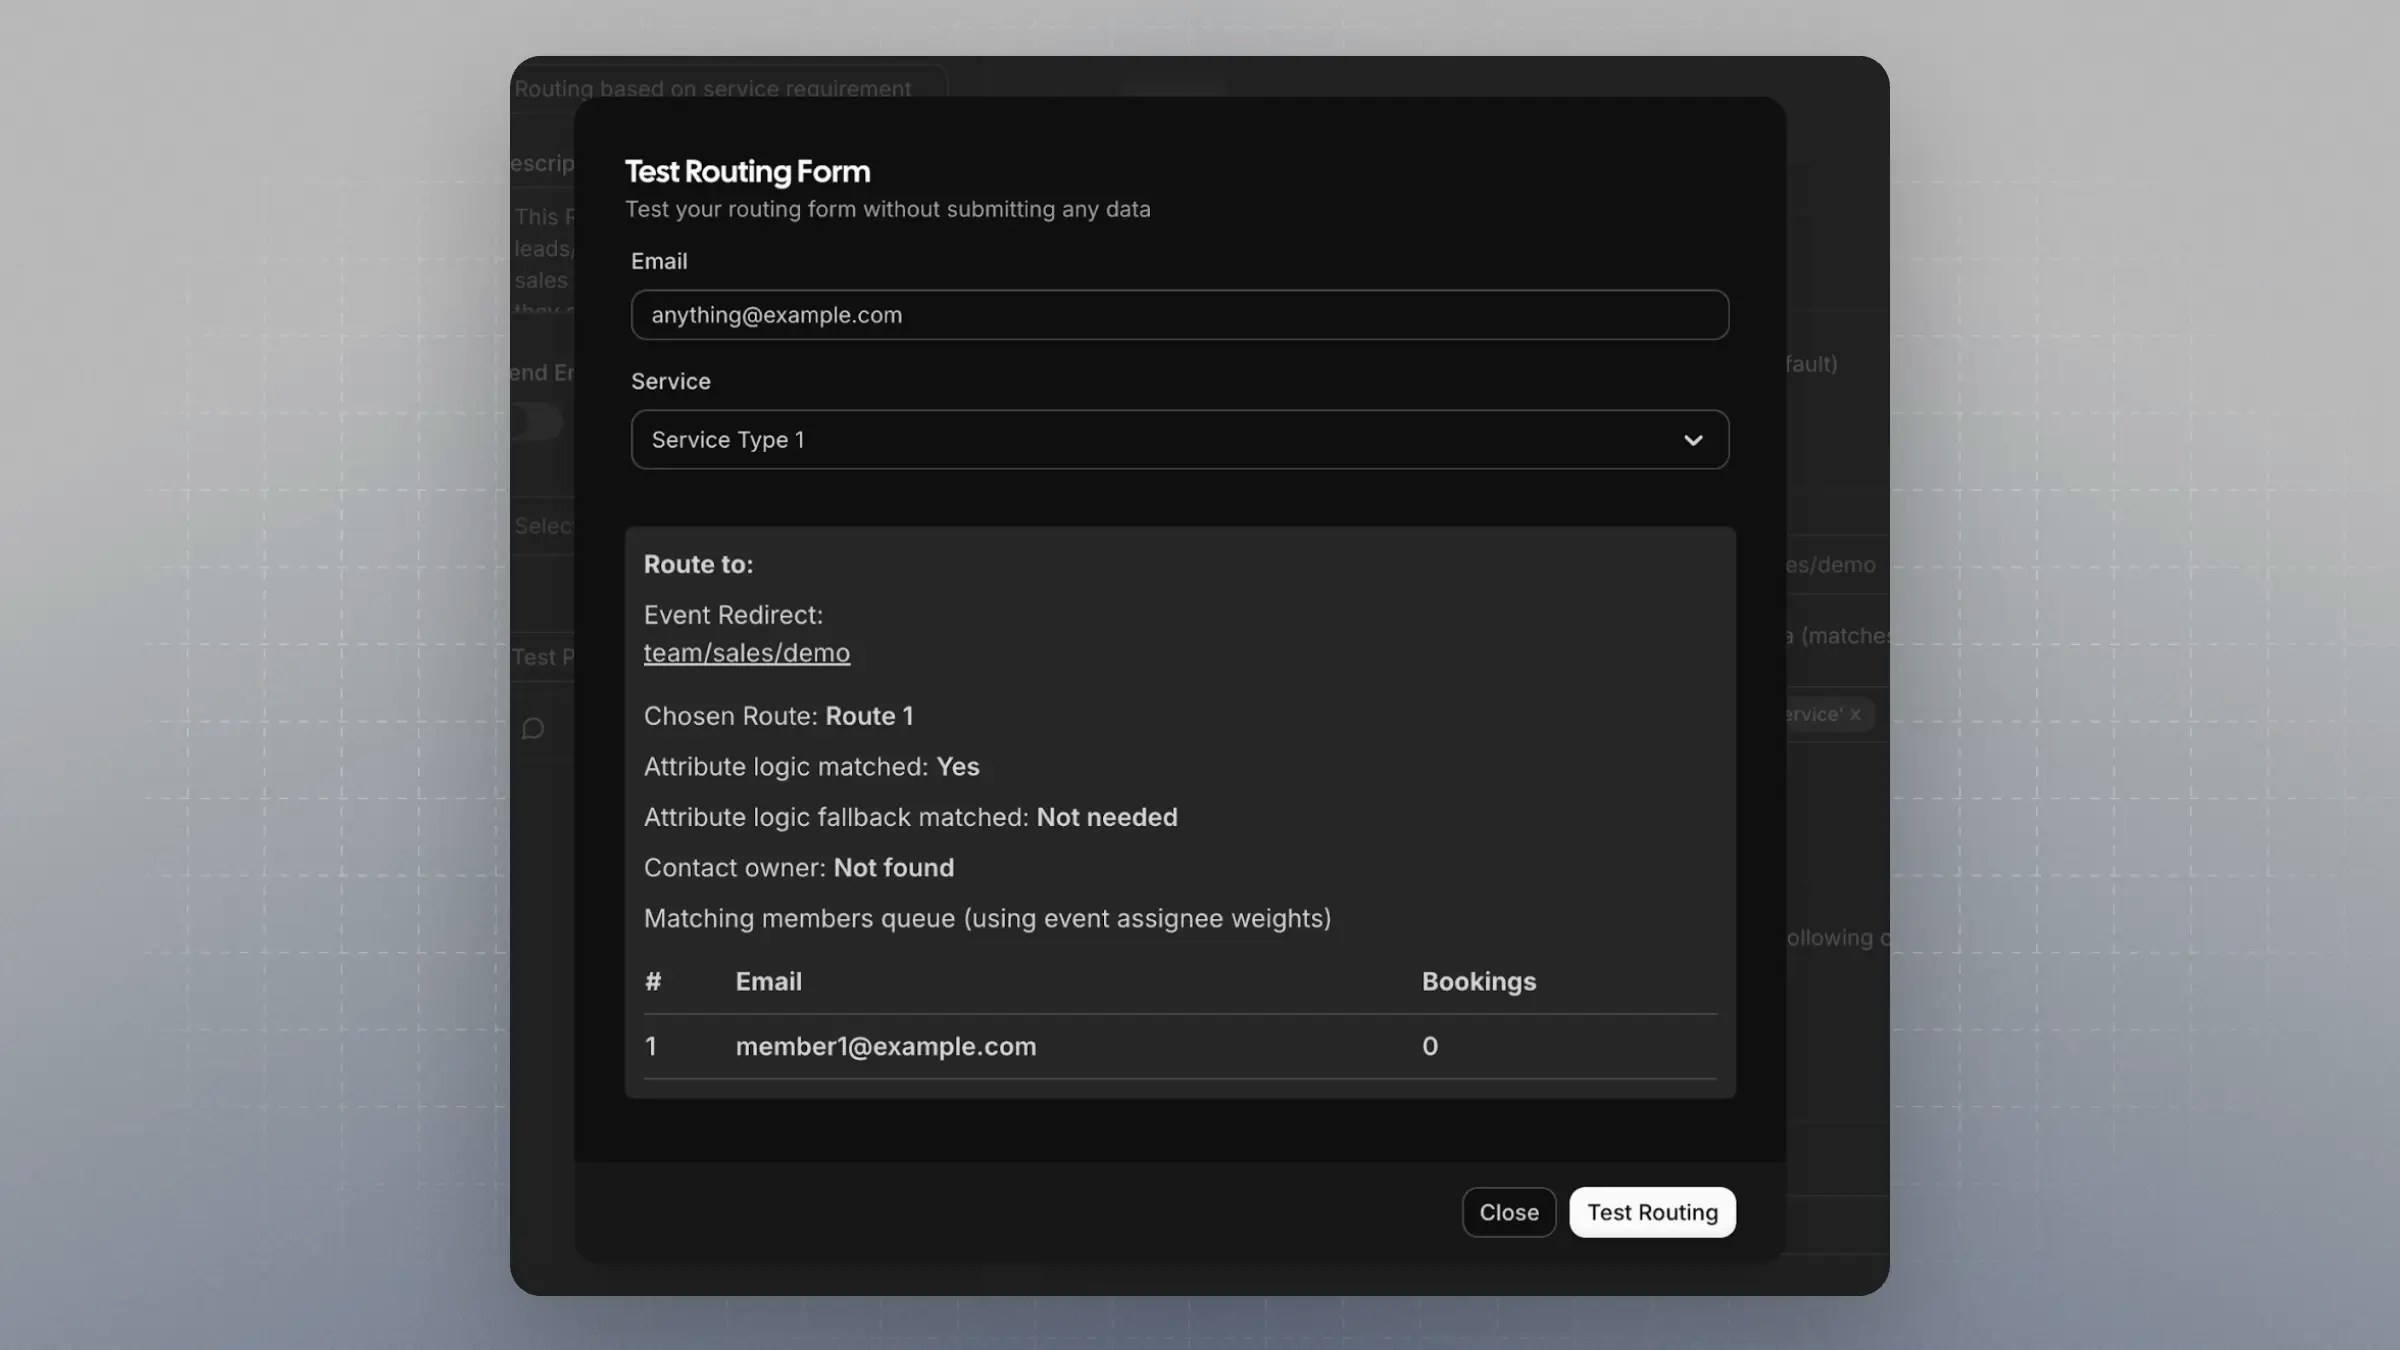
Click Test Preview on the left
-
Input a value that exists in both the Routing Form field and the Attribute
-
The system should now route the booking to a team member with that value assigned in their attributes
-
Sending Leads or Visitors to the RouterThere are two ways to use the Routing setup for collecting bookings:
1. Using the Schedly Routing Form Public Page
You can find the public link for your Routing Form in the UI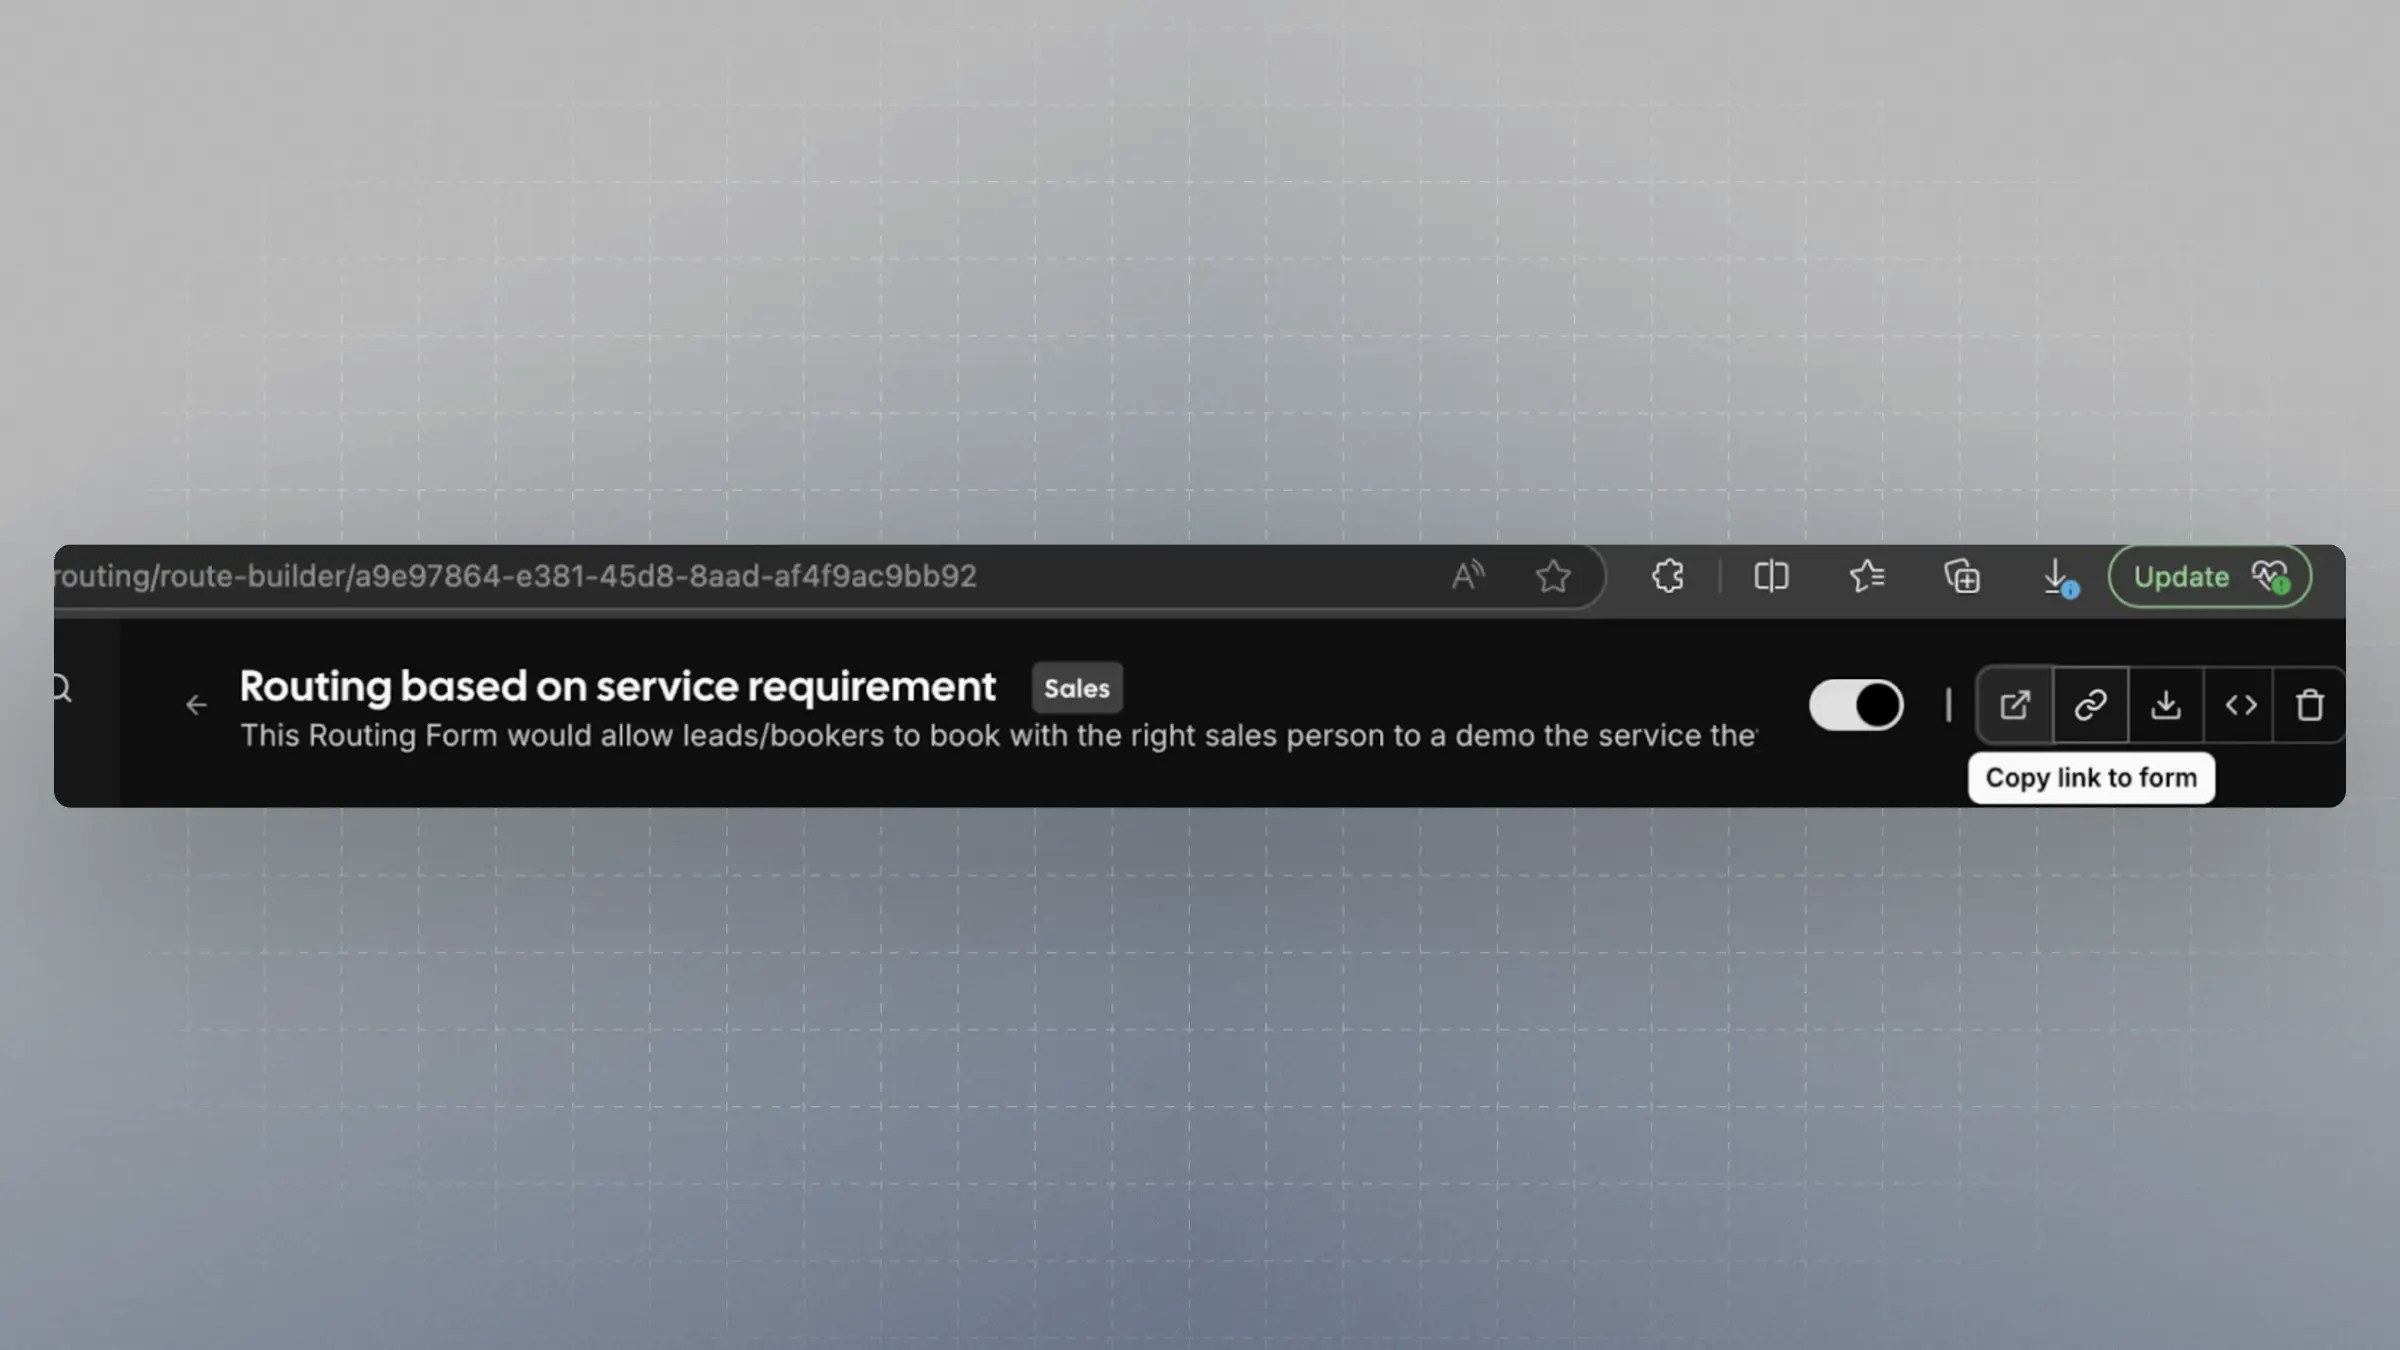
The URL will look like:
app.schedly.io/forms/{FORM_ID}
Share this link with your leads or embed it in your site.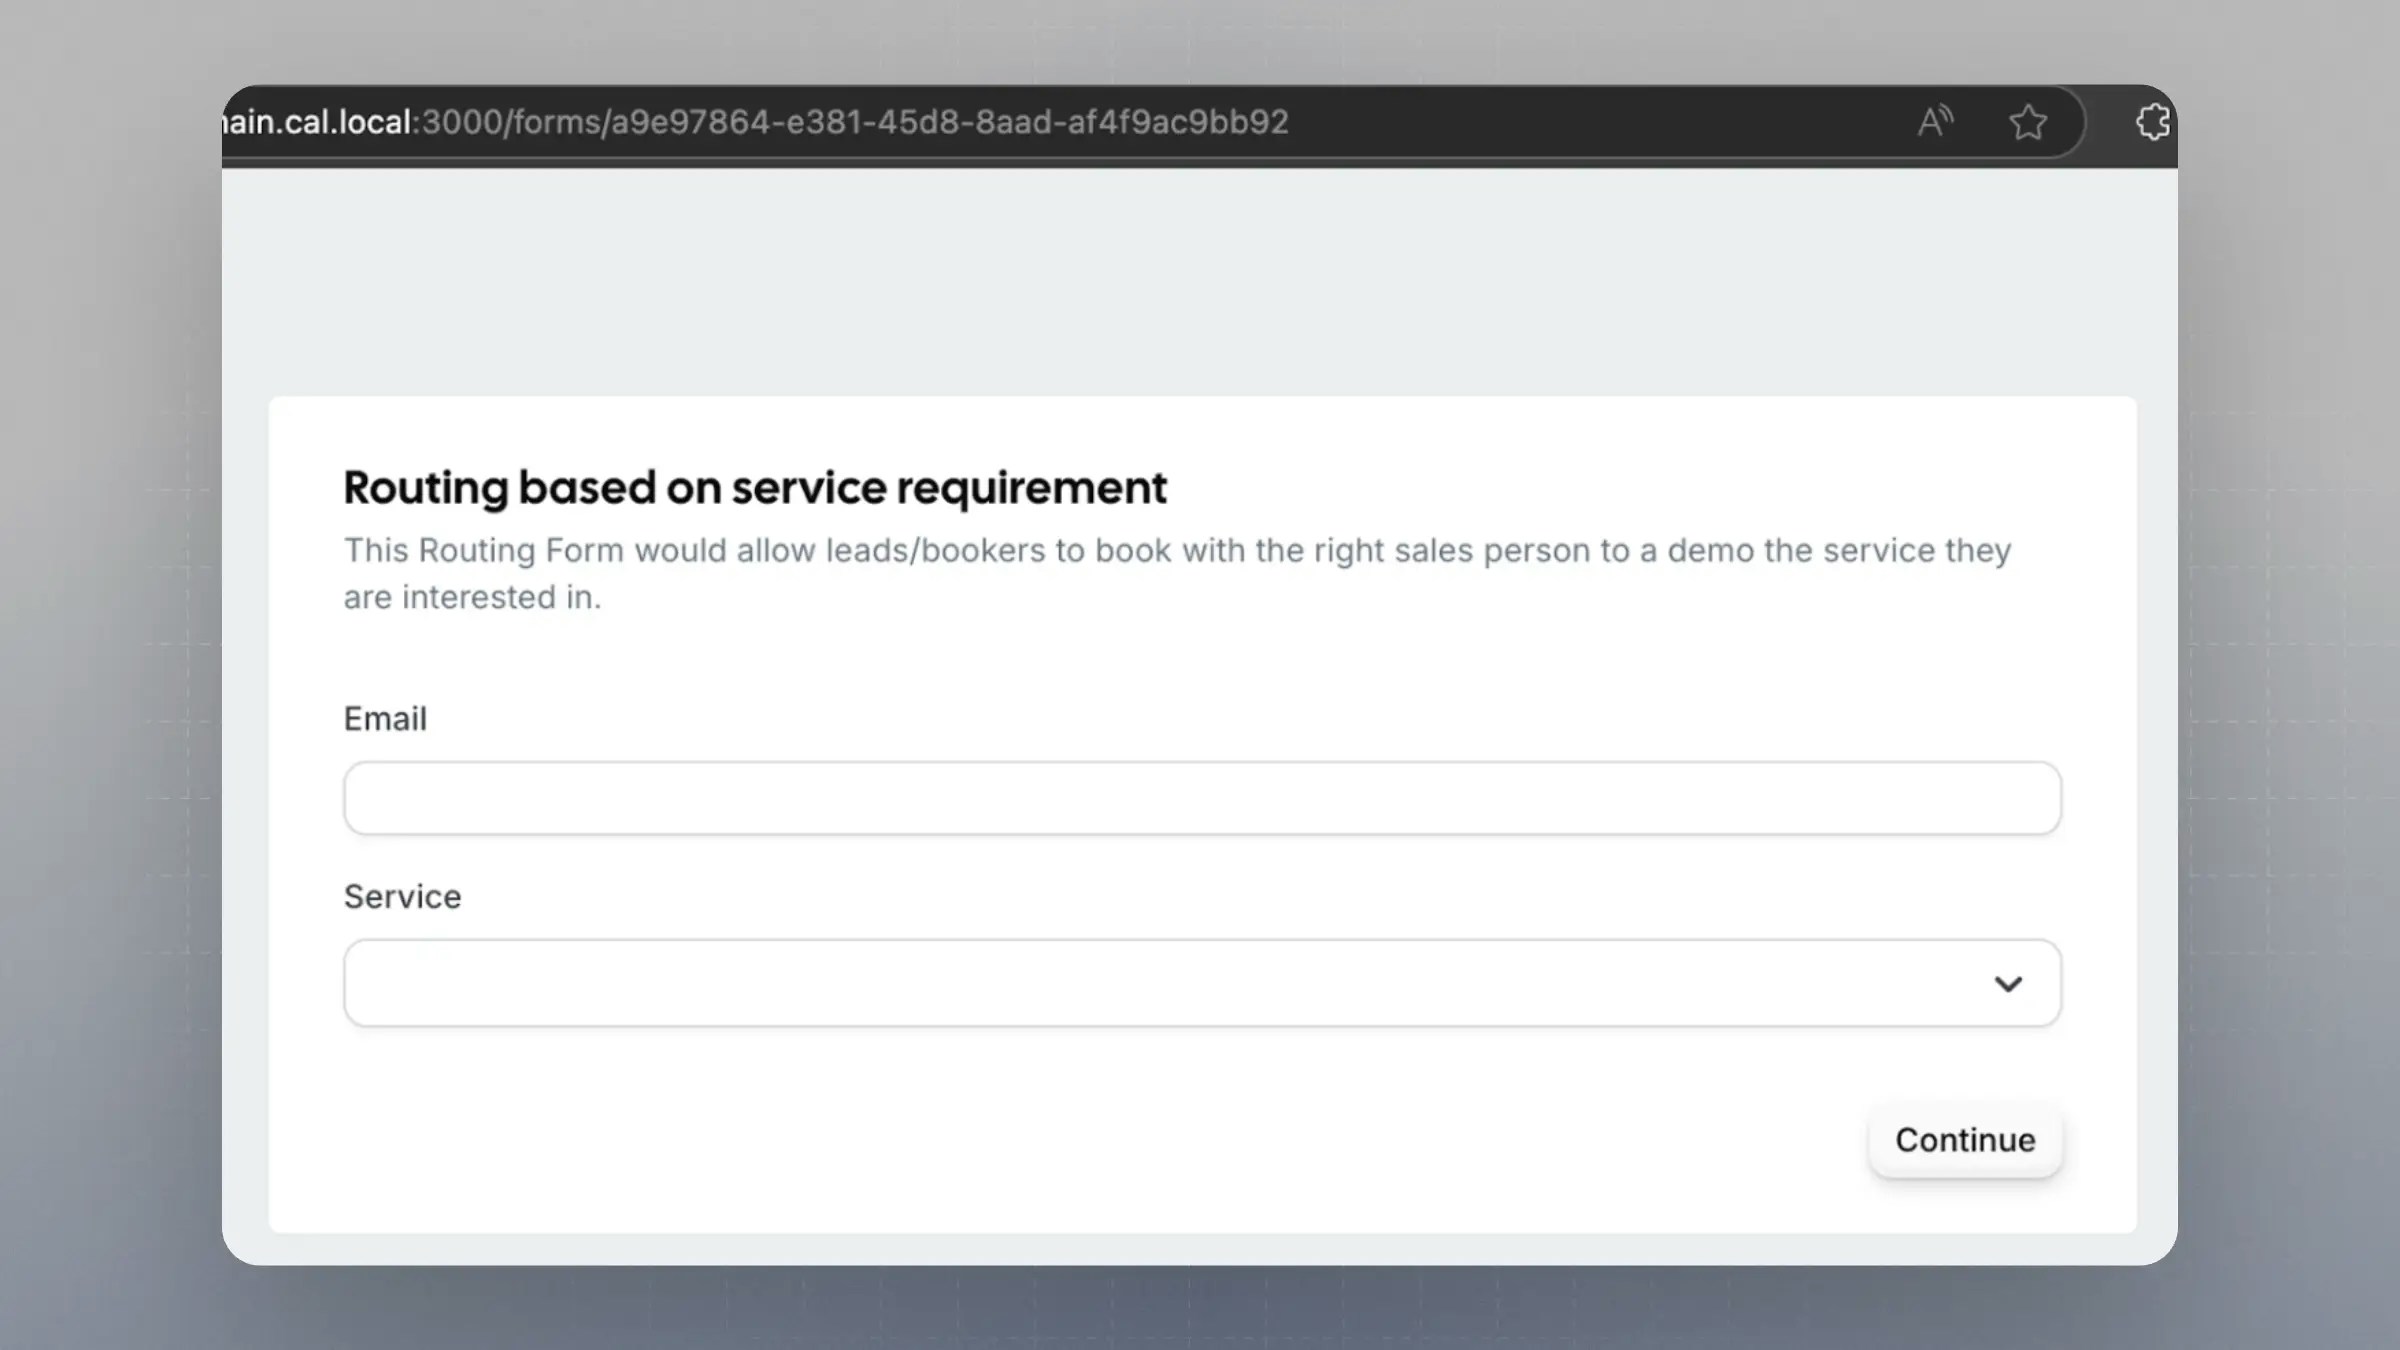
**2. Using Your Own Form with Headless Router (Embed Mode)**If you prefer to design your own form UI but still leverage Schedly routing:
- Use the Headless Router endpoint:
/router?form={FORM_ID}&service=Service%20Type%201&email=jane@example.com
-
The field identifiers become query params in the URL
-
Schedly will handle the routing and direct the user to the appropriate booking page
This gives you full control over your form UI while keeping Schedly as the routing engine.
You’ve now set up a powerful attribute-based Round Robin routing system that integrates seamlessly with your team structure and forms.